The Easiest Salted Caramel Cookie Bars

IMG_1878.JPG

Come here.

Closer.

Closer.

There.

That should be close enough. I have a secret I want to share with you. It involves zero guilt and tons more time on your hands. The secret is this, “There ain’t no shame in the faking it game.”

I read a food blog I adore recently that condemned store bought pie crust. I love that blog. This ain’t that blog. I like homemade pie crust. I like homemade cookie dough. I like my house vacuumed frequently. I like to read after dinner. But we all know there simply isn’t enough time in the day for all of our “likes” and “wants.” Heck. There is barely enough time for the “needs.”

So let’s fake us some homemade cookie bars, shall we?

I won’t tell if you don’t.

I was so pleasantly surprised how well these cookie bars turned out. I do highly recommend using parchment paper, because the bars are too sticky to get out otherwise.

IMG_1875.JPG

Ingredients:

2 packages of sugar cookie dough logs or 1 package of the preflattened sugar cookie dough (I prefer the preflattened kind made by Nestle. It ends up being cheaper, but the logs make a prettier cookie bar)
1/3 cup caramel sauce
1/3 cup toffee bits
Sea salt
Parchment paper

Directions:

Preheat oven to 350 degrees F.

Place parchment paper in an 11 X 7 baking dish. Take a log of sugar cookie dough and press it into place over the parchment paper or lay one layer of your flat cookie dough and push it into the corners of the parchment paper (depending upon which premade sugar cookie dough you purchased). Put into the oven and bake for fifteen minutes.

IMG_1879.JPG

Remove from oven. Microwave caramel for 25 seconds to soften and make it easier to pour. Measure it out. Pour over slightly cooked cookie dough. Sprinkle the toffee bits on top. Now sprinkle sea salt over top. Just give it a nice dusting.

I have a hand-cranked dispenser from Costco, so I turn it seven to ten times over the caramel.

IMG_1877.JPG

Now break up your remaining cookie dough log over the top if you bought the logs or simply place the other cookie sheet over the top, if you bought the preflattened kind.

IMG_1876.JPG

Put the whole thing back into the oven and bake for twenty five minutes. Remove from the oven and let cool for one hour before cutting into bars. I lift the parchment paper with the cookie bar in place and then lay it on my counter before I cut this into bars with my pizza cutter.

IMG_1874.JPG

Now eat this sinfully simple (or would it be simply sinful dessert?). Either way, it is good. It is quick. It is easy. This is my husband’s favorite cookie lately. It is equally good served warm with vanilla ice cream on top drizzled with caramel sauce.

Just bake it. (I am pretty sure Nike did not mean bake a million calories into a dessert when they made that slogan, but I will oblige them by running to the stove the moment these babies are done. That’s gotta burn a zillion calories, right?).

Jamie Oliver’s Milk Chicken

IMG_1434.JPG

I realize it is odd to write about roasting a chicken when everyone is talking about roasting turkeys. Well, I will not be doing a turkey post, because Ina Garten has the best roasted turkey recipe. I have used it every single year, varying the ingredients slightly or not at all, and it is always excellent. I do take additional herbed butter and massage it under the skin. Anyway, that is what I recommend, maybe I will do a post about it one day, probably around The Fourth of July, because that is how organized I am. But let’s talk about chickens for today…

Pinterest is killing me.

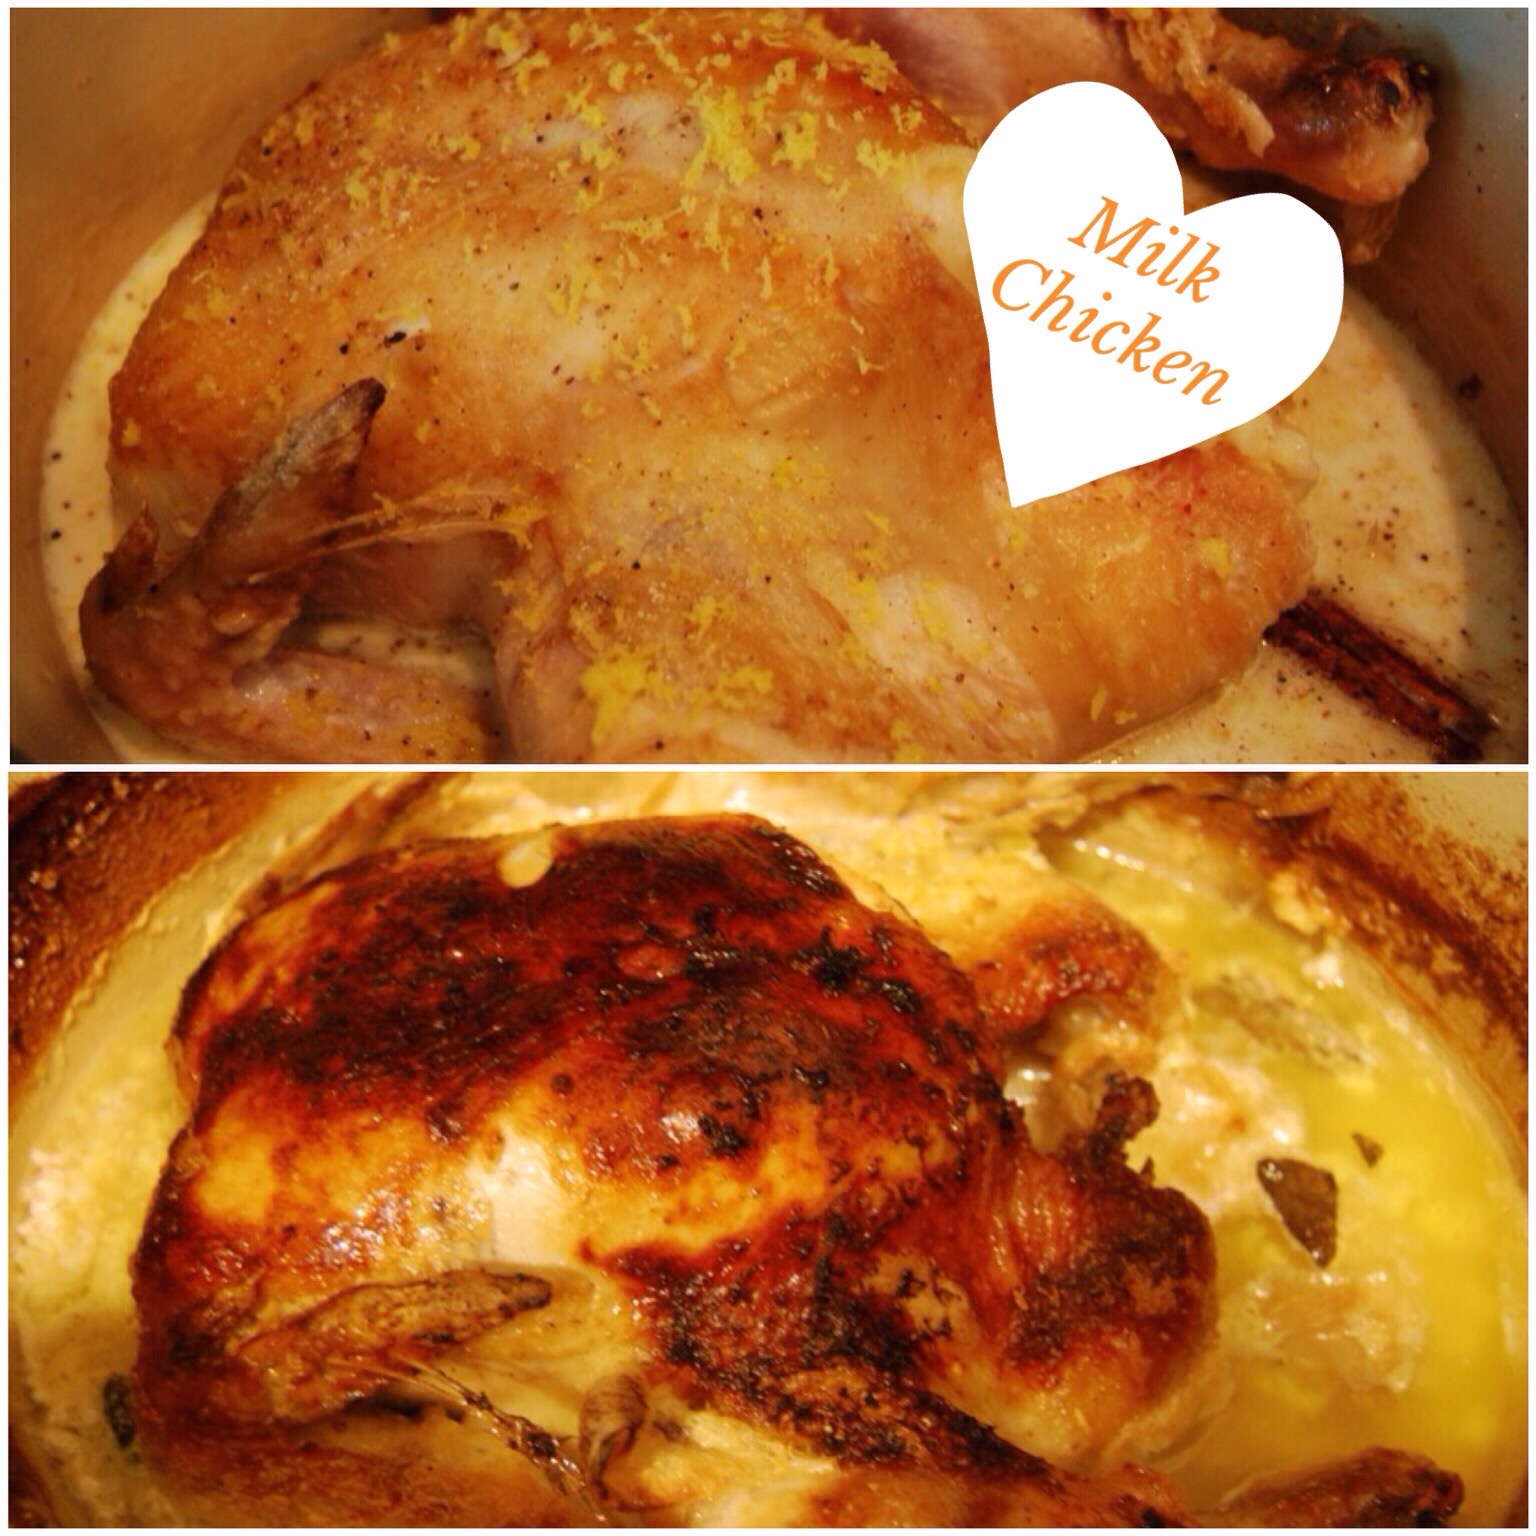
I want to make all of the goodies. I want my house magically cleaned. Organized. And I want to do it all whilst wearing a caftan and simultaneously beading an area rug. Has anyone ever beaded a rug? Could you walk on it? Would it roll? Is it slippery? These are all the questions that Pinterest brings to mind. What does this have to do with chicken? Nothing. Except, I found Jamie Oliver’s Milk Chicken Recipe on Pinterest and I was intrigued.

I did not do Pinterest proud here.

My pictures are bad.
This made my heart sad.
I am not a type A.
Is there a type Z?
It’s a good thing…
I am not Martha Stewart.
Amen.

I have made roasted chickens before, but I don’t like having to deal with the roasting pan. It cannot be put in the dishwasher. Everything I use must be able to be put in the dishwasher. I wanted something easy. Something perfect for my lazy heart.

This chicken is it.

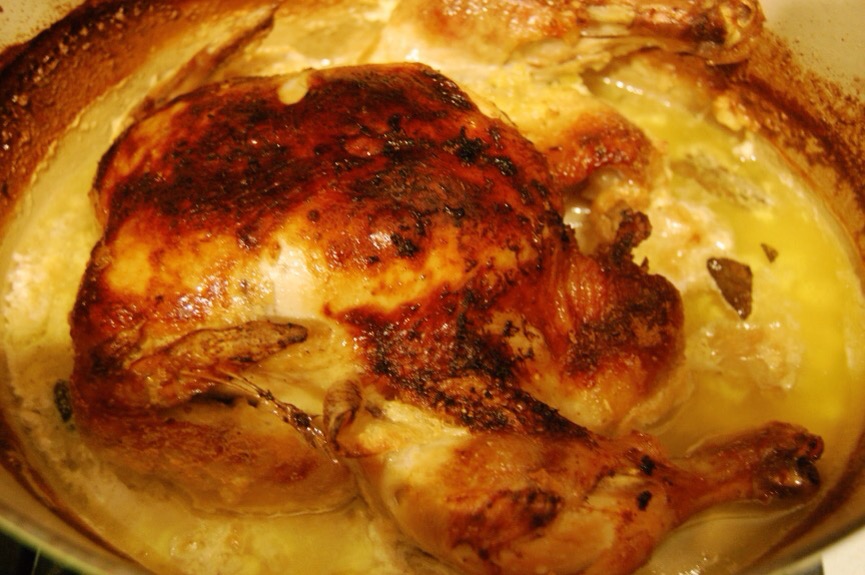
I do need to say that this chicken is cooked in milk. The milk becomes curd in the pan. This does not bother me. It does bother some people. Some people being my husband. My husband hates cottage cheese. So looking into the pan and seeing that I pretty much made my own cottage cheese chicken for dinner was basically his worst nightmare. And my perfect tear-laughing moment. But he did like the chicken. He agreed it had great flavor. He just would not touch the marvelous sauce the chicken cooked in because of this.

His loss.

This recipe is relatively inexpensive, especially since I made enough to have leftovers. There are not a lot of leftovers. However I can stretch them enough for one more dish the next night. I turned the leftovers into chicken noodle soup, chicken spaghetti and even just throwing it into a store-bought curry sauce. You can usually find a whole chicken on sale for around $1 a pound. This recipe called for a three pound bird. Dude. If I am going to be roasting a whole chicken and using up ingredients, I am going to make a bigger bird than that. I have used anywhere from a 4 pound bird to a 6 pound bird. I increased the cooking time around ten minutes per additional pound for the recipe (a la Julia Child but factoring in a lower cooking temperature than she uses). When I made the four pound bird, I just followed Jamie Oliver’s cooking time exactly.

Because this is not my recipe, I usually would not the write ingredients and directions, but according to the comments on The Kitchn (where I also learned to cover the chicken resulting in a more braising than roasting technique), Jamie Oliver made this chicken differently on his show. I tried to piece together the best way people said to make this and combined the advice here:

Ingredients:

1 whole chicken (4-6 pounds)
2 lemons
1/2 stick cinnamon
2 1/3 cup whole milk
7-10 cloves of unpeeled garlic (the recipe calls for ten. I am cheap. I am not spending fifty cents for an additional head of garlic, so cut out as many cloves as you can from one head and use it. A great tutorial for removing the garlic cloves can be viewed here)
A handful of fresh sage
1 tsp salt + some sprinkled on chicken
1/4 tsp. ground pepper + some sprinkled on chicken
1/2 stick salted butter
3 Tbsp. Clarified butter (I buy mine in a jar at Trader Joe’s. Or you can use half butter and half olive oil)

Directions:

IMG_1432.JPG

Preheat oven to 375 degrees F.

You can, if you are of the mind to, truss your chicken if you would like. I do not. Type Z, and all of that. But you can if you choose. Type Z doesn’t judge.

In a large pot (one that comes with a lid), heat clarified butter (or 1 1/2 Tbsp. Butter and 1 1/2 Tbsp. Olive oil) on medium high heat.

Remove giblets from the cavity of the chicken with tongs. Throw them away. Don’t gag.

Season one side of the chicken. Add seasoned side of chicken down into the pot and sear for three to five minutes until it has a nice golden color to it. Season other side and and very carefully rotate the chicken to the other side (I use two pairs of cooking tongs). Sear for three to five minutes. Remove chicken to a plate and carefully discard cooking oil.

Zest the lemons.

Place the chicken back into the pan. Cut the lemons in quarters and push them up into the chicken’s cavity. Place the garlic cloves around the pan. I really want to say, “riddle the garlic cloves around the pot,” but I feared it would not make sense. Plus every time I say the word, “riddle,” I think of Tom Riddle and then I get sidetracked daydreaming about Harry Potter.

Mix the milk and salt and pepper with a fork. ‘Cause you’re fancy. Pour in pan around chicken. Add cinnamon stick. Riddle the sage around the pan. Sprinkle the lemon zest over everything. Add 1/2 stick of butter into the pot.

Cover the pot and place into the oven for forty five minutes for a three-four pound bird. Increase cooking time ten minutes per pound for a larger bird.

After your cooking time has passed, remove lid. Cook an additional forty five minutes. And as Jamie Oliver says, “baste when you remember.”

IMG_1433.JPG

Remove pot from oven. Check your chicken to make sure it is cooked thoroughly.

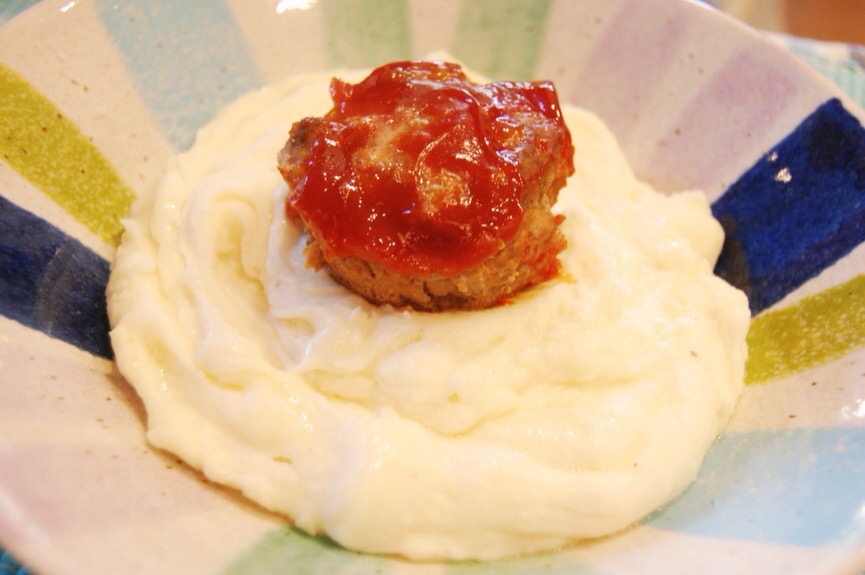
Remove chicken to a plate to rest for five minutes. Carve chicken. Serve. I serve a little bowl of the delicious sauce to dip it in. I serve my chicken with either baked potatoes, mashed potatoes or rice depending upon the laziness of the cook that day.

Pinterest, you win this round.

Because this chicken recipe was amazing. Of course, I made this in my pajamas, in a messy house, whilst browsing the Internet. But Pinterest doesn’t need to know that. Besides It’s too busy researching the next new thing… I’ve heard it’s beaded rugs. Be careful. I’ve also heard they’re slippery.

It’s Marvolo-us!

Meatloaf Muffins

IMG_0957.JPG

I feel the same way about meatloaf that I do about meatballs. Ugh! The name! It really is gag inducing. I will eat a bite of it and be enjoying it, but then it always happens… I start to think, “I am eating a loaf of meat.” A shaped form of meat. M. E. A. T. And then I will push it to the side and eat my mashed potatoes. Which, really isn’t winning any name contests of its own anytime soon.

I sure know how to sell a recipe, don’t I?

Well, this is all to say my husband LOVES meatloaf.

Loves.

And I like to make him happy. Making him happy makes me happy. I am hoping when he reads this he will remember this meal and my sentiments and not the dress that came in the mail today.

So, sometimes I form a mashed-together-pile-of-meat into a loaf. Just for him. I’m a keeper.

Still selling this recipe, aren’t I? Bear with me.

A few years ago, I made a batch of spicy meatloaf muffins (that recipe is not the one featured here). The kids liked the meatloaf made in muffin tins. I liked not having to cut a loaf of meat. Swallow. Breathe. And the other day I decided to make meatloaf muffins again using a variation of my meatball recipe. Would that make these meat muffins? There has to be a better name!

I served the meat muffins over mashed potatoes and it was so good. My husband actually groaned. And in a good way, not in a, “these recipe names are disgusting,” way that you are doing now.

I will absolutely keep making these little round suns of meaty happiness over clouds of potatoes. They are easy. They are fun. And everyone liked them.

Ingredients:

1/2 pound ground pork
1/2 pound of ground beef (I like 96/4 so that there is not a huge layer of fat on top of the meat at the end. I hate that!)
1/2 tsp. salt
1/4 cup dried Italian bread crumbs
1 egg
1/4 cup diced Onions cooked sautéed in 2 Tbsp. butter
Pinch chili flakes
2 Tablespoons of Dalmatia My Mom’s Red Pepper Spread (any kind of red pepper spread is good. I also really like the one Trader Joe’s carries)
1 tsp. worcestershire sauce
1 clove or 1/2 tsp. of minced garlic (sautéed at the last minute with the onions)
1/4-1/2 cup ketchup

Directions:

Preheat oven to 400 degrees F.

Grease muffin pans. This will yield eight meatloaf muffins.

Your package of meats are probably about one pound each. If that is true, split each package in half and save the remainder of the meats for another meal. I used mine as a substitute for the whole pound of meat in the coffee ground spaghetti recipe that I love. It was delicious.

IMG_0973.JPG

In a small pan, sauté onions in the butter for 7 minutes. Add garlic and sauté for an additional one minute.

IMG_0974.JPG

Add butter, garlic and onions to a large mixing bowl. Allow to cool for five minutes.

IMG_0975.JPG

Add all remaining ingredients except ketchup and mix with hands until incorporated. You do not want to over mix. Just make sure everything is together.

IMG_0954.JPG

Now with an ice cream scoop, scoop meat into muffin pan.

Repeat until all meat is in the pans. Now layer ketchup over each muffin so that no meat pokes through.

IMG_0976.JPG

Place in oven and bake for twenty-twenty five minutes. I removed mine at twenty two minutes and cut open one to make sure it was done inside. I know this goes against every culinary rule (but, I mean really, we’re making meatloaf muffins here. How technically accurate do I need to be?), but I rest my meatloaf muffins on a paper towel for two minutes because I do not like the excess fat.

IMG_0964.JPG

I served mine on top of mashed potatoes.

And it was good, despite the flaw of its name. It had a perfect blend of flavors and the creamy mashed potatoes brought it all together. I am actually craving them as I write this. I am a meatloaf convert. Let’s just keep this between us.

Shakespeare once wrote,

“A rose by any other name would smell as sweet.”

Well…

“Meatloaf by any other name will still taste of meat.”

Hmmmm… still not sure I’m sellin’ these right.

Oatmeal Chocolate Cookie PMS Bars

IMG_0281.JPG

These really should be called PMS Bars. Seriously. And I almost named this post that, but since this is not my recipe, I did not go there.

But then I did.

‘Cause I am a walking contradiction.

Who also happens to be a chocolate monster.

IMG_0289.JPG

Besides we all know PMS just just stands for Pass Me Some. And I definitely want someone to pass me some of these chocolate oatmeal bars. They are gooey. Super easy to make and oh, so, delicious. I can say that because this is not my recipe. I did change a few things so I am going to post the ingredients and directions, however, I barely touched the recipe so the credit for this scrumptiousness goes completely to the blog Megan and Claudy. And if you want the original recipe minus talks of “Pinch My Skittles!”, I recommend heading over there. If you want to see how I made them, here it is:

But first, did ya know that Permanent Markers Stain? Seriously, I can’t stop. It’s a problem.

Ingredients:

3 1/4 cup Wondra flour (original recipe calls for 2 1/2 cups reg. flour and that would be fine. I was out of regular flour when I made these. I am a bad food hoarder)
2 1/2 cups regular oats
2 sticks of softened salted butter
2 eggs
1 tsp. baking soda
1/2 tsp. salt
2 cups brown sugar (I always bake with organic brown sugar. It does make a difference)
2 tsp. vanilla
1/3 cup milk

Chocolate Filling:

1 14 oz. can Eagle’s Brand Sweetened Condensed Milk
1/3 cup butter
2 cups semi-sweet chocolate chips (a 12 oz. bag)
1 tsp. vanilla

IMG_0294.JPG

Directions:

I used a stand mixer, but a hand mixer would be just fine, too.

Preheat oven to 350 degrees F.

Grease a 9 X 13 pan and set aside.

Beat together butter and brown sugar until light (about 1 1/2 min.). Add vanilla and milk. Beat together until mixed. Add eggs one at a time. Beat the first one for about twenty seconds before adding the next one. Beat the second egg in the mixture until mixture fluffs up about thirty seconds. Add salt and baking soda and mix. Add flour and mix. Add oats and mix.

Add the chocolate filling ingredients into a sauce pan over medium heat and whisk until melted together. Turn off heat.

IMG_0295.JPG

Place 2/3 of your cookie mixture into the bottom of your greased 9 X 13 pan. Pour chocolate filling mixture over top. Pause to lick spatula. Place now-contaminated spatula in sink. Praise yourself for being sneaky and clean. With the remainder of the cookie dough, grab pieces and just place over the top of the chocolate filling, trying to cover the top. The top will not be completely covered and that is okay. You want to see the oooeey gooey sinfulness peeking through the cookie dough.

Place the pan into the oven and bake for 45 minutes (depending on if you like gooey cookies or more sturdy ones. The actual recipe called for twenty five minutes, and that would be good if you like very, very gooey bars). If top starts to get too brown, you can cover it with foil. My bars were still moist after forty five minutes.

IMG_0282.JPG

IMG_0277.JPG

Remove the pan and let cool for an hour before cutting into the bars. Samurai Sword optional not recommended. Do you think I could have picked a bigger knife?

IMG_0296.JPG

After you make these, you might exclaim “Pickle My Stars!” and then “Pleasure My Sneakers!” If I am around I will know exactly what you mean. And be happy. ‘Cause I know you will give me some. If I’m not around, you might want to whisper your exclamations. Some People Might Sneer. And that would be bad.

Period.