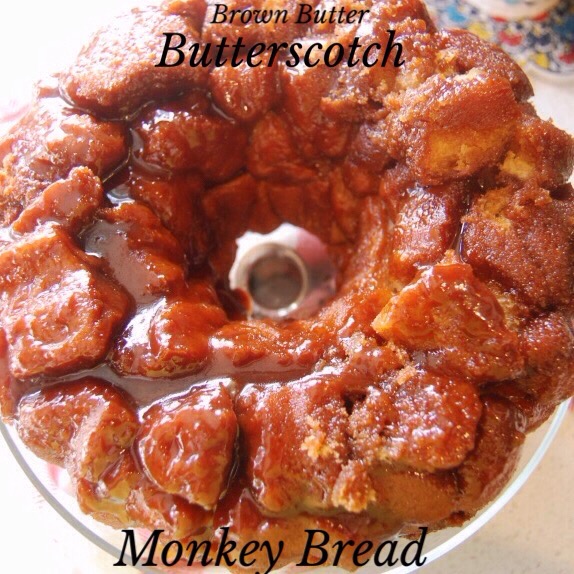
Brown Butter Butterscotch Monkey Bread

That’s a mouthful!

IMG_3380-0.JPG

My kids love monkey bread. They love when I buy it at the local bakery. I knew they would get a kick out of this easy make-at-home recipe.

This was the first thing I ever made in the kitchen. My grandma and I would make it all of the time. Then we moved on to a children’s cookbook. We rarely made monkey bread after that. This recipe brings back such memories of nostalgia, as only the tantalizing scents of cinnamon and sugar together can evoke. Has there ever been a more perfect pairing?

This recipe is fantastic to bake with kids. They love cutting up the biscuits and shaking the dough in the sugar. It is a quick and easy treat. Perfect for those of us who need immediate gratification.

This recipe was adapted from The Pioneer Woman and the butterscotch pudding part was courtesy of my good friend, Kerri. She once made the stuff and I dreamed about it for weeks. The brown butter part is strictly from my gluttonous imagination.

Need:

Bundt Pan

Ingredients:

3 large cans of refrigerated biscuits (I use 2 regular and one buttermilk)
1 cup sugar
1/2 cup brown sugar
1 Tablespoon ground cinnamon
1 cup salted butter (2 sticks)
1 3.4 oz. package of regular (not instant) butterscotch pudding

You can get crazy with this treat! Dare I say, if you monkey around with this recipe in the kitchen, the possibilities might be endless.

Groan.

Let me hang and scratch my embarrassed head.

On to the baking:

Preheat oven to 350 degrees F.

Generously grease bundt pan.

IMG_3277.JPG

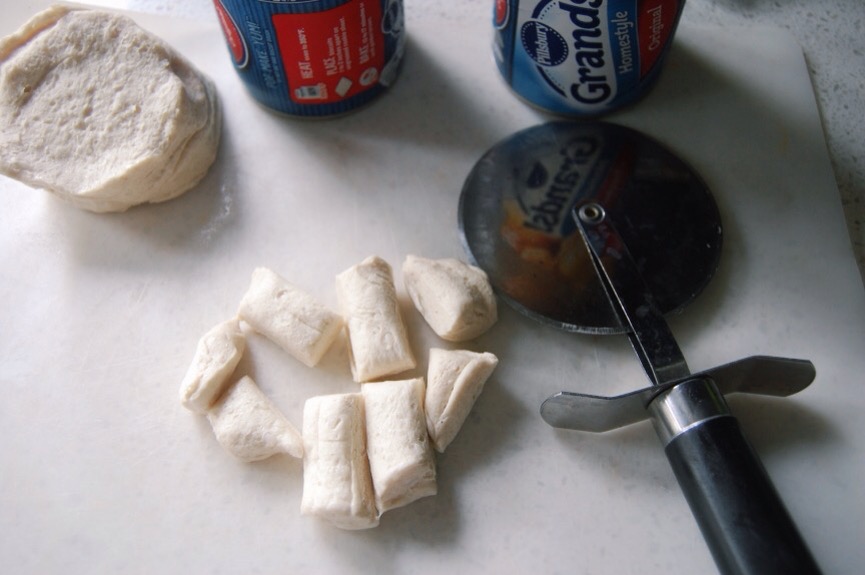
Cut biscuits into small pieces with a pizza cutter. I cut one can of biscuits into shapes of four, one can in shapes of six, one can in shapes of eight. I like a variety of sizes in my monkey bread. Let’s call them squirrel monkey, chimpanzee, and gorilla sizes. Because we can? We’re quite passed the point of should. We’re using two sticks of butter and over a cup of sugar here, peeps. Crazy names for biscuits are the least of our worries.

IMG_3267-0.JPG

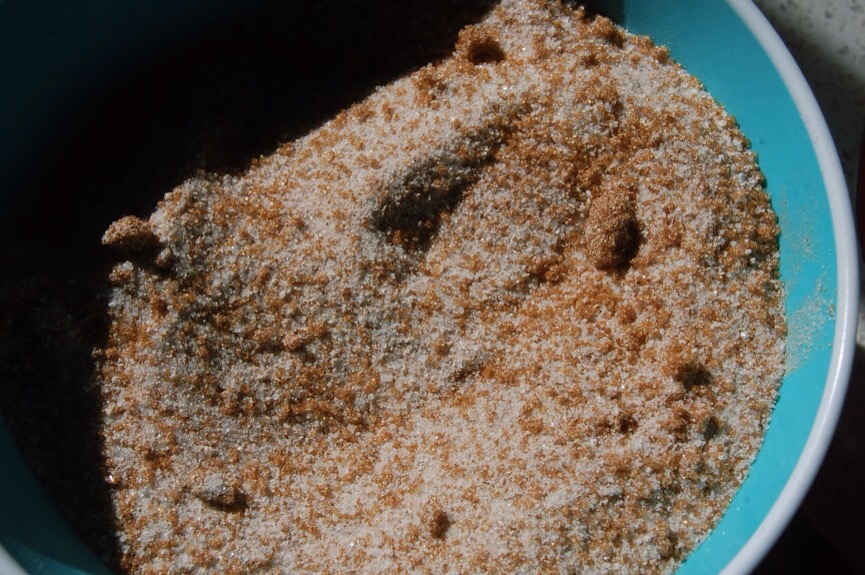
Combine the regular sugar and cinnamon. Add the brown sugar and mix. Place in a gallon sized bag. Or if you reach this step and realize you are completely out of gallon sized bags, call yourself a monkey’s uncle and mix the ingredients in a large mixing bowl. Primitive times are these, my friend.

Add cut biscuits in the bag of sugar mixture and shake. If you added it to the bowl, please do not shake, just mix. Of course, you knew that. But if a monkey child is reading this, I want to be specific.

IMG_3273.JPG

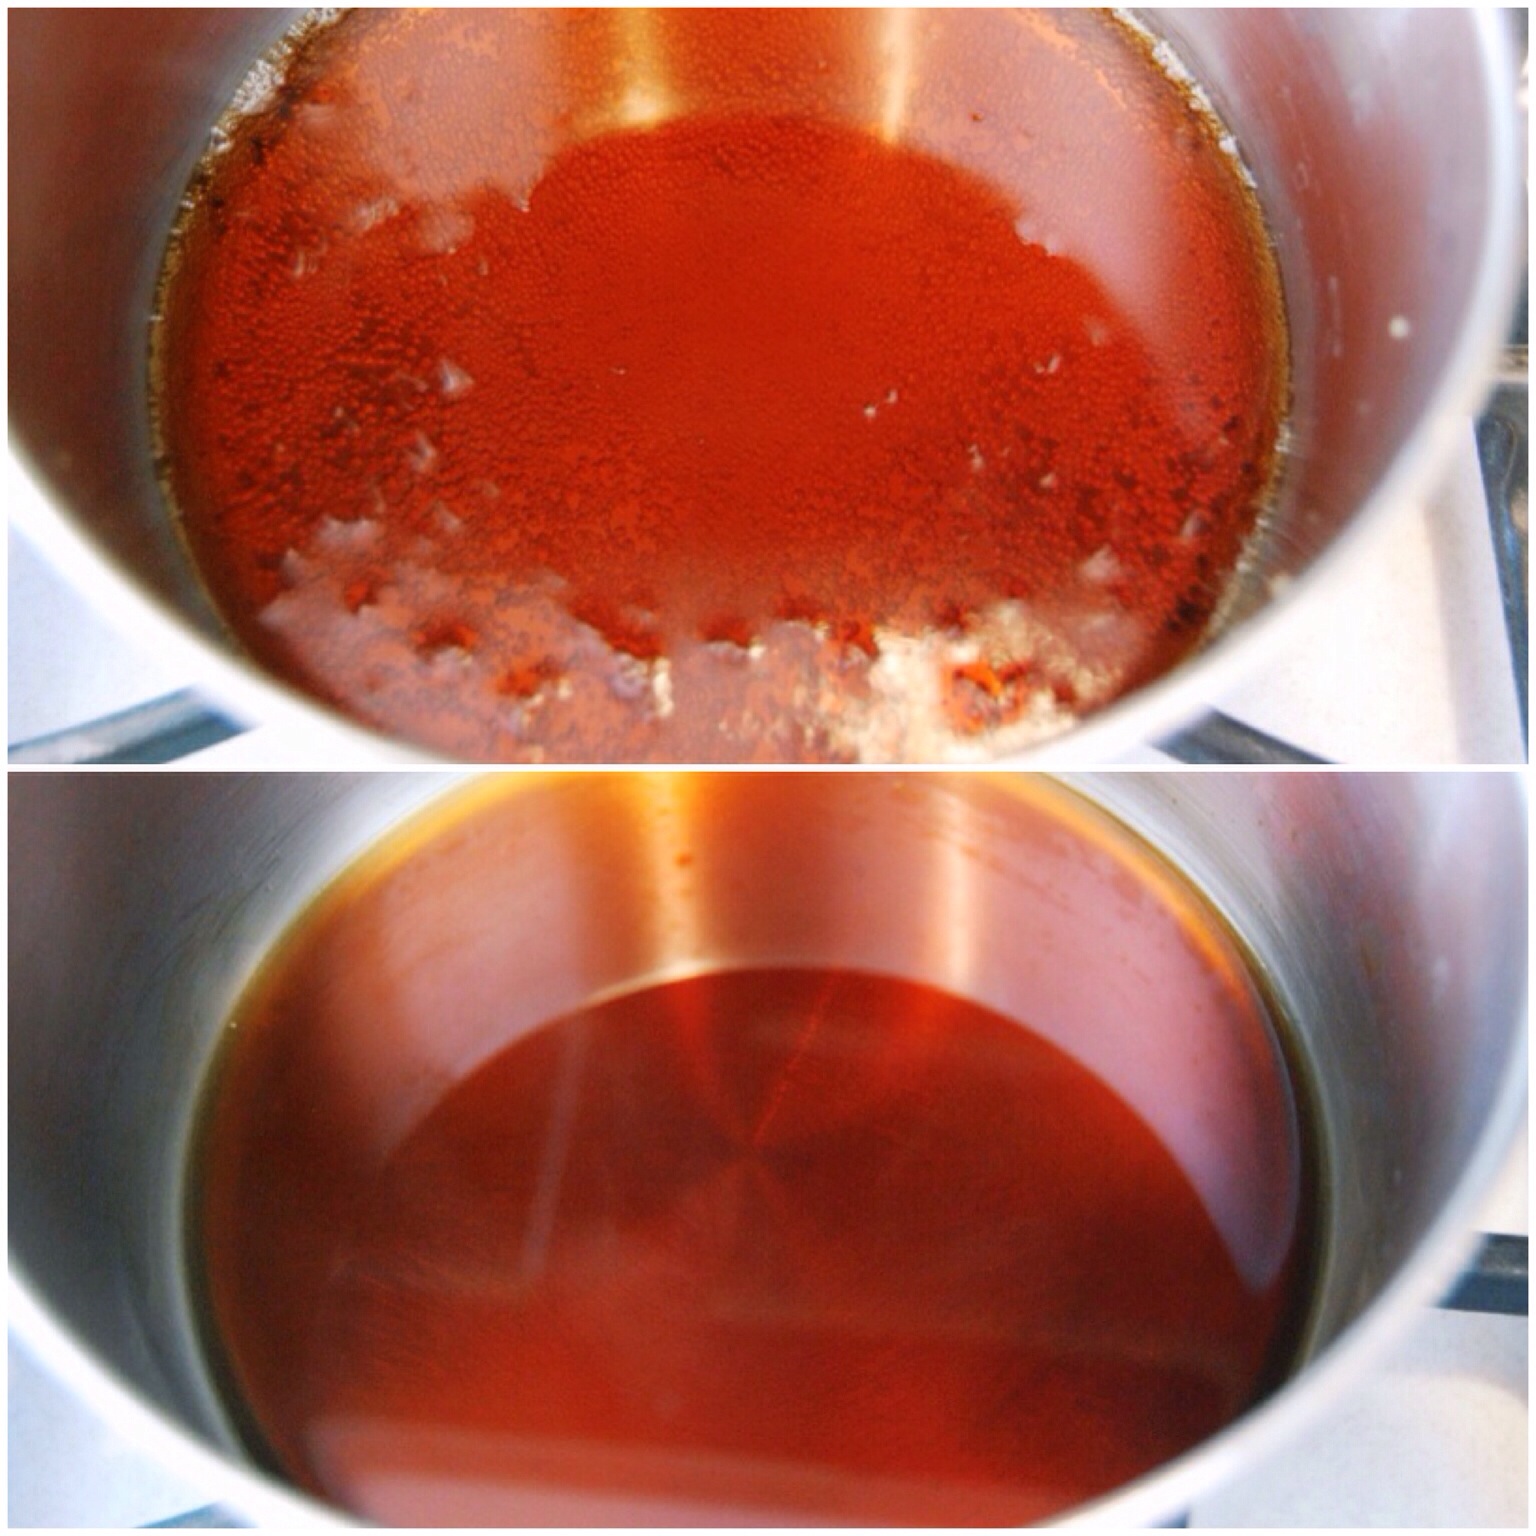
In a small saucepan on the lowest heat on your largest burner on your stovetop melt the butter. Stir every minute or so. When the foam starts to turn a caramel brown (usually about ten to twelve minutes) turn off the heat. Your nose will be able to tell you when the butter is brown because it will smell like the most glorious nutty caramel. The foam will start to bubble up in a gluttonous display of brown surrender. This means it is done. Remove from heat.

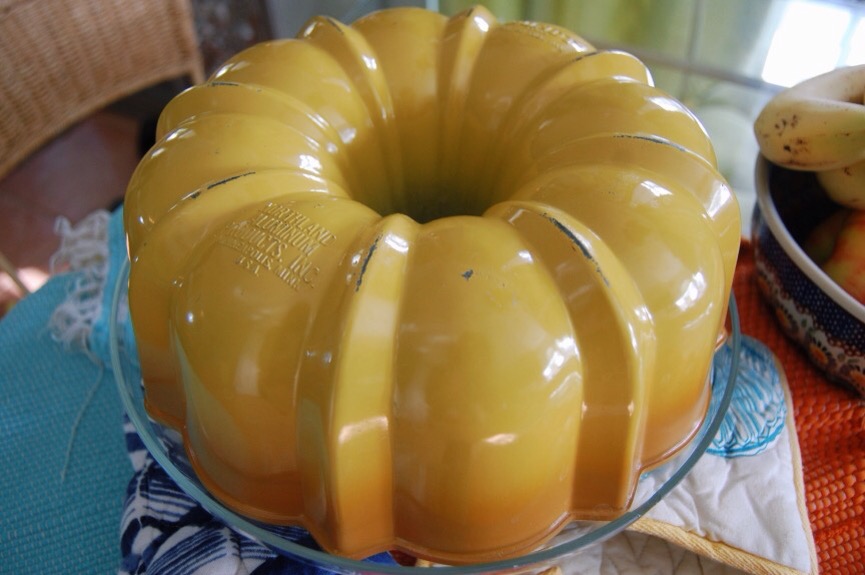
Now pour the sugar-coated biscuit dough and all of that glorious sugar mixture evenly into the bundt pan (I have a vintage yellow one from Etsy. You can find them there for around $15. It won’t make your monkey bread taste better but it will make you feel better).

IMG_3375.JPG

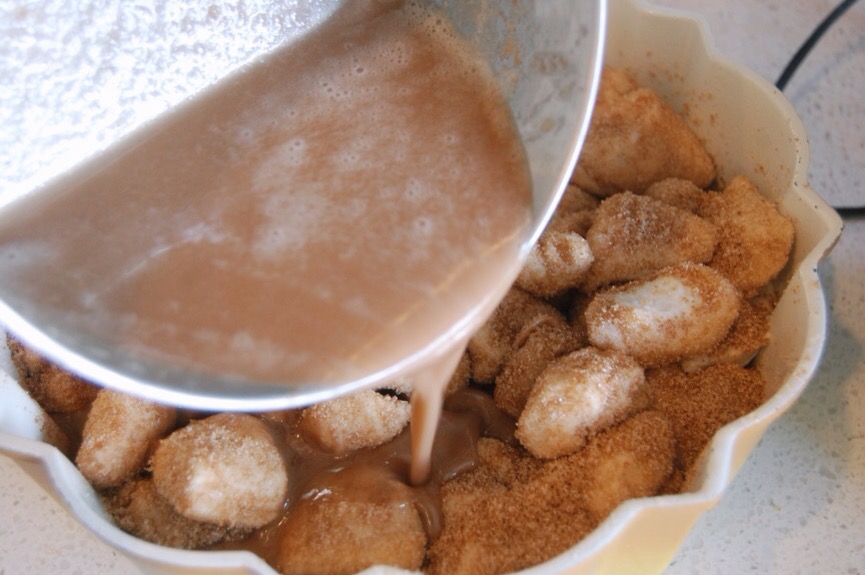
Mix the pudding mix into the brown butter. Edited to add: I do this with a fork. Beat it for just thirty seconds or so like you would an egg. It does not have to dissolve all of the way. It will do that when baking. If there is any bigger bits, just put it on the money bread. It will bubble up in the oven and become one gooey mixture. Oh, take a moment, if you must. This is the part where I get teary eyed. Pour brown butter pudding mixture over the top of all of the biscuit dough. Try to do this as evenly as possible.

IMG_3376.JPG

And scrape up all of the decadent brown bits at the bottom of the pan and put on top of the dessert.

Place in the oven and bake for 60 minutes. Cover the top with foil after it has been baking for twenty five minutes so that it does not get too crunchy and brown on top.

IMG_3274.JPG

Remove from the oven. Allow to cool for 20 minutes. Turn over on serving plate. It is easiest to hold the hot pan with a cloth kitchen towel versus the bulk of oven mitts. Say a quick prayer to the monkey Gods. Offer up a banana sacrifice, if you must. This part is tricky. The caramel in the pan will be hot, be careful not to burn yourself. Gently pull up on the bundt pan. If there is any caramel mixture on the bottom, scrape it up and put it on the monkey bread.

IMG_3372.JPG

Whoooo! Whoooo! Heeee! Heeee! Haaaa!

IMG_3377.JPG

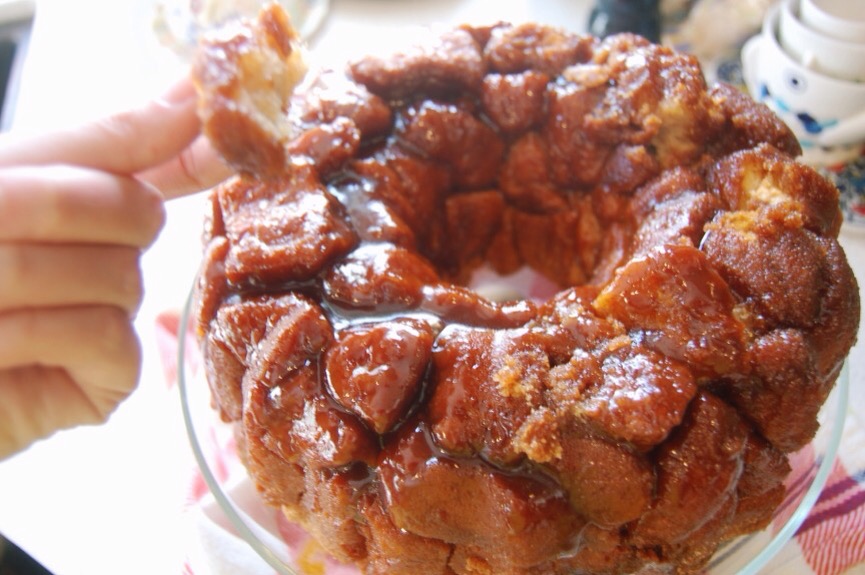
The monkey bread will pull apart in yummy gooeyiness.

Scratch your underarms and scream in triumph at the magnificent success. And if some of the monkey bread sticks to your pan just place it back on the dessert. Or if it completely falls apart (happens to the best of us, rearrange the pieces in two loaf pans. No one will be the wiser. Besides it will be gone before anyone, or any primate for that matter, would ever notice, anyway.

IMG_3371.JPG

Enjoy! I don’t mean to brag, but my brain thighs are entirely made of this stuff.

Easy Lasagna

IMG_2150.JPG

Lasagna.

My mother makes the best lasagna in the world. Happy Birthday Mom! I love you! I ask for it for my own birthday. This is not her recipe. But I still think it is really good. I have made lasagna for years. In fact, it was the first “complicated” meal I ever attempted.

It’s is one of those dishes that looks hard to make, but is incredibly easy to execute. I find it calming to make the layers. I also feel like a superhero when I view the final completed project. And who doesn’t want to feel like a superhero? Well, unless it is The Hulk. Nobody wants to feel like The Hulk. Unless you are a ten year old boy. Or me, apparently from all of the posts I have done on it. But even then, you gotta admit the name leaves much to be desired.

Remember my new favorite spaghetti recipe that uses coffee grounds and is made in the crockpot? Well, I usually have three quarts of sauce left after the first dinner that I separate into three individual quart containers and freeze for use at a later date. I have friends with three sons. Actually, when I think about it, I have a lot of friends with three sons. I have heard that with that many boys they do not get as many leftovers as I do with a recipe. In fact, the exact words were, “What are leftovers?” I think with the crockpot spaghetti recipe, they would probably only have one to two quarts left after the initial dinner. There should still be enough to freeze at least one additional meal, so if you have a larger family, do not be discouraged. Make it. Save the rest. Then make a giant lasagna that will appease all. Even three growing boys.

The other day I took one quart out of the freezer. This is completely off topic, but make sure you defrost any sauces appropriately before you reheat them. I thought it would be a great idea to just throw the frozen sauce into a pan and bring it to heat. The sauce broke up into nuclear hot parts and frozen chunks. It splattered out and hit my arm where it made a small hole. I eventually had to see a doctor for it. I will definitely have a scar from it, so please be careful in reheating.

So, I defrosted the sauce first and then reheated the sauce and added an additional jar of pasta sauce to make it stretch further.

Then I just layered it into a lasagna. It was so good.

Okay. Finally. On to the recipe:

IMG_2142.JPG

Ingredients:

1 quart of prepared spaghetti sauce (I use this recipe, but you could use your favorite)
1 jar of your favorite pasta sauce
One package of lasagna noodles (you can use no-boil ones or the fresh ones above. I highly recommend the fresh ones above, found in the refrigerated section of the grocery store near the ricotta. Do not use regular lasagna noodles unless you boil them first. I have attempted to use them without boiling. They are not as good. They are about one minute before al dente tasting)
2 cups grated mozarella cheese
1 cup grated parmesan cheese
15-16 oz. of ricotta cheese

Directions:

Preheat oven to 350 degrees F.

Yell, “You’re making me hungry! You won’t like me when I’m hungry!” If your family stares at you during this time, stare back, unwavering in your lasagna conviction.

Defrost spaghetti sauce for two-three hours and then reheat in a large pot over low heat with additional jar of pasta sauce until hot. Turn off heat.

IMG_2143.JPG

IMG_2153.JPG

IMG_2156.JPG

IMG_2148.JPG

Take a 9 X 13 pan and ladle in some spaghetti sauce into the bottom of the pan until the bottom is just coated. About 2/3 cup.

Take lasagna noodles and lay on top of sauce. This is two of the fresh ones above.

Take half of your ricotta and smear over lasagna noodles. Ladle one third of your sauce over the top, sprinkle one cup of mozzarella cheese. Place noodles over cheese. Spread the remaining ricotta over the noodles. Ladle one third of your sauce over the top. Sprinkle one cup of mozzarella. Lay noodles over cheese. Ladle the remaining sauce over noodles. Sprinkle one cup of Parmesan cheese over the top.

Cover with foil and bake for thirty minutes. After thirty minutes, uncover and bake for an additional fifteen minutes.

Remove from oven and let rest for five to ten minutes.

IMG_2146.JPG

And serve.

IMG_2147.JPG

Hulk Hands not optional.

The Easiest Salted Caramel Cookie Bars

IMG_1878.JPG

Come here.

Closer.

Closer.

There.

That should be close enough. I have a secret I want to share with you. It involves zero guilt and tons more time on your hands. The secret is this, “There ain’t no shame in the faking it game.”

I read a food blog I adore recently that condemned store bought pie crust. I love that blog. This ain’t that blog. I like homemade pie crust. I like homemade cookie dough. I like my house vacuumed frequently. I like to read after dinner. But we all know there simply isn’t enough time in the day for all of our “likes” and “wants.” Heck. There is barely enough time for the “needs.”

So let’s fake us some homemade cookie bars, shall we?

I won’t tell if you don’t.

I was so pleasantly surprised how well these cookie bars turned out. I do highly recommend using parchment paper, because the bars are too sticky to get out otherwise.

IMG_1875.JPG

Ingredients:

2 packages of sugar cookie dough logs or 1 package of the preflattened sugar cookie dough (I prefer the preflattened kind made by Nestle. It ends up being cheaper, but the logs make a prettier cookie bar)
1/3 cup caramel sauce
1/3 cup toffee bits
Sea salt
Parchment paper

Directions:

Preheat oven to 350 degrees F.

Place parchment paper in an 11 X 7 baking dish. Take a log of sugar cookie dough and press it into place over the parchment paper or lay one layer of your flat cookie dough and push it into the corners of the parchment paper (depending upon which premade sugar cookie dough you purchased). Put into the oven and bake for fifteen minutes.

IMG_1879.JPG

Remove from oven. Microwave caramel for 25 seconds to soften and make it easier to pour. Measure it out. Pour over slightly cooked cookie dough. Sprinkle the toffee bits on top. Now sprinkle sea salt over top. Just give it a nice dusting.

I have a hand-cranked dispenser from Costco, so I turn it seven to ten times over the caramel.

IMG_1877.JPG

Now break up your remaining cookie dough log over the top if you bought the logs or simply place the other cookie sheet over the top, if you bought the preflattened kind.

IMG_1876.JPG

Put the whole thing back into the oven and bake for twenty five minutes. Remove from the oven and let cool for one hour before cutting into bars. I lift the parchment paper with the cookie bar in place and then lay it on my counter before I cut this into bars with my pizza cutter.

IMG_1874.JPG

Now eat this sinfully simple (or would it be simply sinful dessert?). Either way, it is good. It is quick. It is easy. This is my husband’s favorite cookie lately. It is equally good served warm with vanilla ice cream on top drizzled with caramel sauce.

Just bake it. (I am pretty sure Nike did not mean bake a million calories into a dessert when they made that slogan, but I will oblige them by running to the stove the moment these babies are done. That’s gotta burn a zillion calories, right?).

Root Beer Chocolate Cake

IMG_9702.JPG

Mmmmm. Hmmmmm. Ohhhhhh. Yeeeeeaaaaaaa. That is what I thought to myself when I watched Carla from The Chew (I love that show. And I love her. Anthropologie lovers, Carla wears a lot of clothes from there, on the show) make her chocolate root beer cake. I went online to get the recipe and I was disappointed to see that the recipe for the cake part differed from the one she made on t.v. I gave it up until I saw that someone in the comments had geniusly used a boxed cake mix and substituted the water it called for for root beer.

I can do that, I thought.

But then I didn’t.

I drank the root beer and ate some chocolate cookies and considered the flavor craving dealt with.

I had forgotten that I know myself well enough to have purchased two bottles of root beer. So when I came across the other bottle sitting unsuspecting on the shelf. Minding its own business. Not knowing that soon it would be meeting its soul mate, chocolate. No need to tell it about the part involving the oven. And then my mouth. Let’s be kind… I had to make the cake.

IMG_9694.JPG

This is my new favorite cake. I am so excited to share this recipe. The best part about it is that it is incredibly easy to make. Well, and it tastes good. Our cake was gone in two days. We are a family of four. Two days. The math adds up to gluttony deliciousness.

Time to unite the star-crossed lovers…

Cake Ingredients:

1 devil’s food boxed cake mix
3 eggs
1/3 cup melted butter
1 cup root beer plus 3 Tbsp. root beer reserved for cooled cake rounds

Frosting ingredients:

1 cup root beer
1 1/2 cups powdered sugar
1 cup white chocolate melted (I used Merckens melting chocolates because I had it but she said to use white chocolate chips. Either will work)
A pinch of salt (I just added three shakes of my salt shaker)
1/2 cup (1stick) softened salted butter
1 tsp. vanilla extract

Directions:

Preheat oven to 350 degrees F. If you have a convection oven, preheat at 325 degrees F convect bake. Generously spray two nine inch round cake pans with nonstick cooking spray.

IMG_9695.JPG

In your mixer or with a hand mixer in a bowl, beat together melted butter, eggs, cake mix, and one cup of root beer until mixed together. This is about one minute.

Pour cake mix evenly into the two cake pans. Give them each a gentle tap on the countertop to rid them of extra air bubbles. Put the cake pans in the oven and bake cake according to directions on box. Because of the fluffy mix produced from the root beer, my cakes needed two minutes longer than the longest baking time on the package (I baked mine thirty one minutes on convect bake).

Remove cake rounds from the oven. Let cool for five minutes in cake pans.

IMG_9704.JPG

After five minutes, run a butter knife gently around the edge of the cake and the cake pan. Flip cake over onto cooling rack. Repeat with other layer. Allow to completely cool.

In the meantime, pour the one cup of root beer for the frosting into a small saucepan. On medium low heat simmer the root beer until it reduces to a third of a cup. I actually was overzealous with my simmer and reduced it to a quarter cup. This still worked out fine. This should be about five to seven minutes to reduce.

IMG_9708.JPG

It will look like this. Turn off burner. Allow to cool.

IMG_9699.JPG

Now that the cakes are cool, you are going to brush the cake layers evenly with the 3 Tbsp. of reserved root beer (not the reduced stovetop product! That is for the frosting) with a basting brush. Yep. Give the two lovers a wet root beer kiss.

Melt white chocolate (I put mine in a bowl and microwave for thirty second intervals, stirring each time. Usually takes 90 seconds to melt).

In your stand mixer or with your hand mixer in a bowl, beat together softened butter and powdered sugar until fluffy about two minutes. Add salt and mix. Add white chocolate and beat for a few seconds until incorporated. Add reduced stovetop root beer, and vanilla extract and blend until smooth.

I, very helpfully, do not have a picture of this part. I do, however, have a picture of me posing with the frosting. Which I have been told has nothing to do with is very important when baking a cake.

IMG_9705.JPG

Place one cake round with basted root beer side up on a cake stand. Spread one third of the frosting on the layer towards the middle, leaving a little room at the edges because when you put the other cake layer on top, it will push the frosting further out.

IMG_9696.JPG

Place the other cake layer on top of the frosted bottom layer. Frost top with remaining frosting. I like to place it in the middle and then gently ease it towards the edge until it barely goes over.

Cover or immediately serve.

Now eat the mingled lovers. Why does something that sounds so wrong taste so right? Don’t try to analyze it, just enjoy.

IMG_9703.JPG

My daughter has requested this cake as her birthday cake coming up in October. She doesn’t even usually like cake. My husband woke me up the day after I had made this at 9:00 in the morning holding a plate with a half eaten large slice of the cake that he could not resist for breakfast (this is not a breakfast cake. He just has as much self control as his wife). Maybe he was feeling the ingredient love.

IMG_9678.JPG

I promise, a bite of this cake , and you will feel the romance, too.

P.S. My Giveaway ends tonight at 9:00 PST. Please do not forget to enter.