The Easiest Chicken Tamale Casserole

IMG_9648.JPG

The other day I came across this recipe on Pinterest. It was a delicious looking homemade tamale casserole. My mouth salivated.

“Self,” I said. I always call myself self. Unless I don’t. “Self, why don’t we make this recipe?”

“Let me see it.” Self is pretty demanding.

Self looked over the ingredients. Then she looked at me. You would be surprised how difficult that last part is.

“Girl, we are too lazy to make this.”

I looked the recipe over and was sad to see that she was right. But I happen to be a bit smarter than Self. And a bit more lazy. It is funny how that works.

“Why don’t we just use store bought tamales?”

I think Self agreed because she proceeded to drive us to the grocery store to get them.

Here is the easy recipe we came up with:

IMG_9664.JPG

Ingredients:

1 package of green chile and cheese tamales (mine came with six for our family of four)
1 10 oz. can of green enchilada sauce
2 cups of diced cooked chicken breast (Self bought us a rotisserie chicken)
2 cups shredded Mexican blend cheese (1 8 oz. package)

Optional toppings:

Sour cream
Chopped cilantro
Salsa

IMG_9661.JPG

“Self, can we really call this a recipe? All we did was throw some ingredients into a pan. It’s kind of embarrassing.”

“Calm down. Move over. Let me give the directions.”

Directions:

IMG_9991.JPG

“Sorry about Jenni. She’s too theatrical. Let’s just get to the recipe with no more shenanigans.”

Preheat oven to 350 degrees F.

Pour a small amount of enchilada sauce into the pan. Unwrap tamales from corn husks. Place tamales in a line in the pan. I would use an 11 X 7 pan next time. My 9 X 13 was too big. Place diced chicken on top of tamales. Pour enchilada sauce over chicken. Sprinkle with shredded cheese. Cover with foil and bake twenty minutes. Uncover and bake another 5-10. You want the cheese melted but not brown.

IMG_9667.JPG

Top with toppings of your choice. We served ours with rice, tortilla chips and homemade salsa. It was a good quick meal and we will definitely be making it again.

IMG_9668.JPG

I hope one of yous makes this. Then all of yous will be happy.

Root Beer Chocolate Cake

IMG_9702.JPG

Mmmmm. Hmmmmm. Ohhhhhh. Yeeeeeaaaaaaa. That is what I thought to myself when I watched Carla from The Chew (I love that show. And I love her. Anthropologie lovers, Carla wears a lot of clothes from there, on the show) make her chocolate root beer cake. I went online to get the recipe and I was disappointed to see that the recipe for the cake part differed from the one she made on t.v. I gave it up until I saw that someone in the comments had geniusly used a boxed cake mix and substituted the water it called for for root beer.

I can do that, I thought.

But then I didn’t.

I drank the root beer and ate some chocolate cookies and considered the flavor craving dealt with.

I had forgotten that I know myself well enough to have purchased two bottles of root beer. So when I came across the other bottle sitting unsuspecting on the shelf. Minding its own business. Not knowing that soon it would be meeting its soul mate, chocolate. No need to tell it about the part involving the oven. And then my mouth. Let’s be kind… I had to make the cake.

IMG_9694.JPG

This is my new favorite cake. I am so excited to share this recipe. The best part about it is that it is incredibly easy to make. Well, and it tastes good. Our cake was gone in two days. We are a family of four. Two days. The math adds up to gluttony deliciousness.

Time to unite the star-crossed lovers…

Cake Ingredients:

1 devil’s food boxed cake mix
3 eggs
1/3 cup melted butter
1 cup root beer plus 3 Tbsp. root beer reserved for cooled cake rounds

Frosting ingredients:

1 cup root beer
1 1/2 cups powdered sugar
1 cup white chocolate melted (I used Merckens melting chocolates because I had it but she said to use white chocolate chips. Either will work)
A pinch of salt (I just added three shakes of my salt shaker)
1/2 cup (1stick) softened salted butter
1 tsp. vanilla extract

Directions:

Preheat oven to 350 degrees F. If you have a convection oven, preheat at 325 degrees F convect bake. Generously spray two nine inch round cake pans with nonstick cooking spray.

IMG_9695.JPG

In your mixer or with a hand mixer in a bowl, beat together melted butter, eggs, cake mix, and one cup of root beer until mixed together. This is about one minute.

Pour cake mix evenly into the two cake pans. Give them each a gentle tap on the countertop to rid them of extra air bubbles. Put the cake pans in the oven and bake cake according to directions on box. Because of the fluffy mix produced from the root beer, my cakes needed two minutes longer than the longest baking time on the package (I baked mine thirty one minutes on convect bake).

Remove cake rounds from the oven. Let cool for five minutes in cake pans.

IMG_9704.JPG

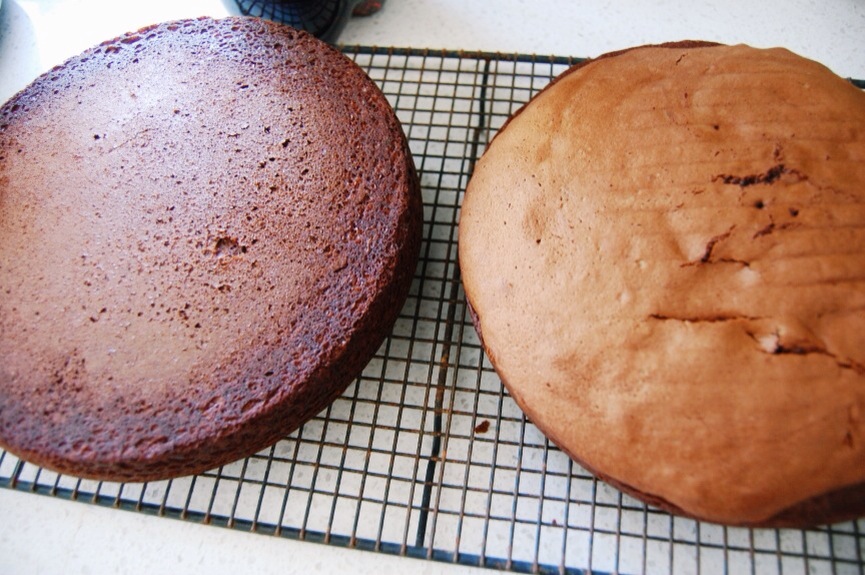
After five minutes, run a butter knife gently around the edge of the cake and the cake pan. Flip cake over onto cooling rack. Repeat with other layer. Allow to completely cool.

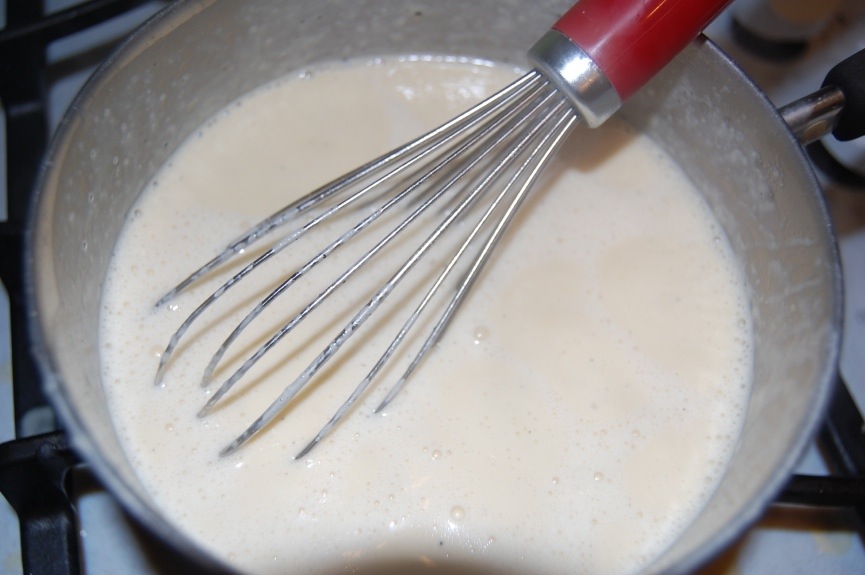
In the meantime, pour the one cup of root beer for the frosting into a small saucepan. On medium low heat simmer the root beer until it reduces to a third of a cup. I actually was overzealous with my simmer and reduced it to a quarter cup. This still worked out fine. This should be about five to seven minutes to reduce.

IMG_9708.JPG

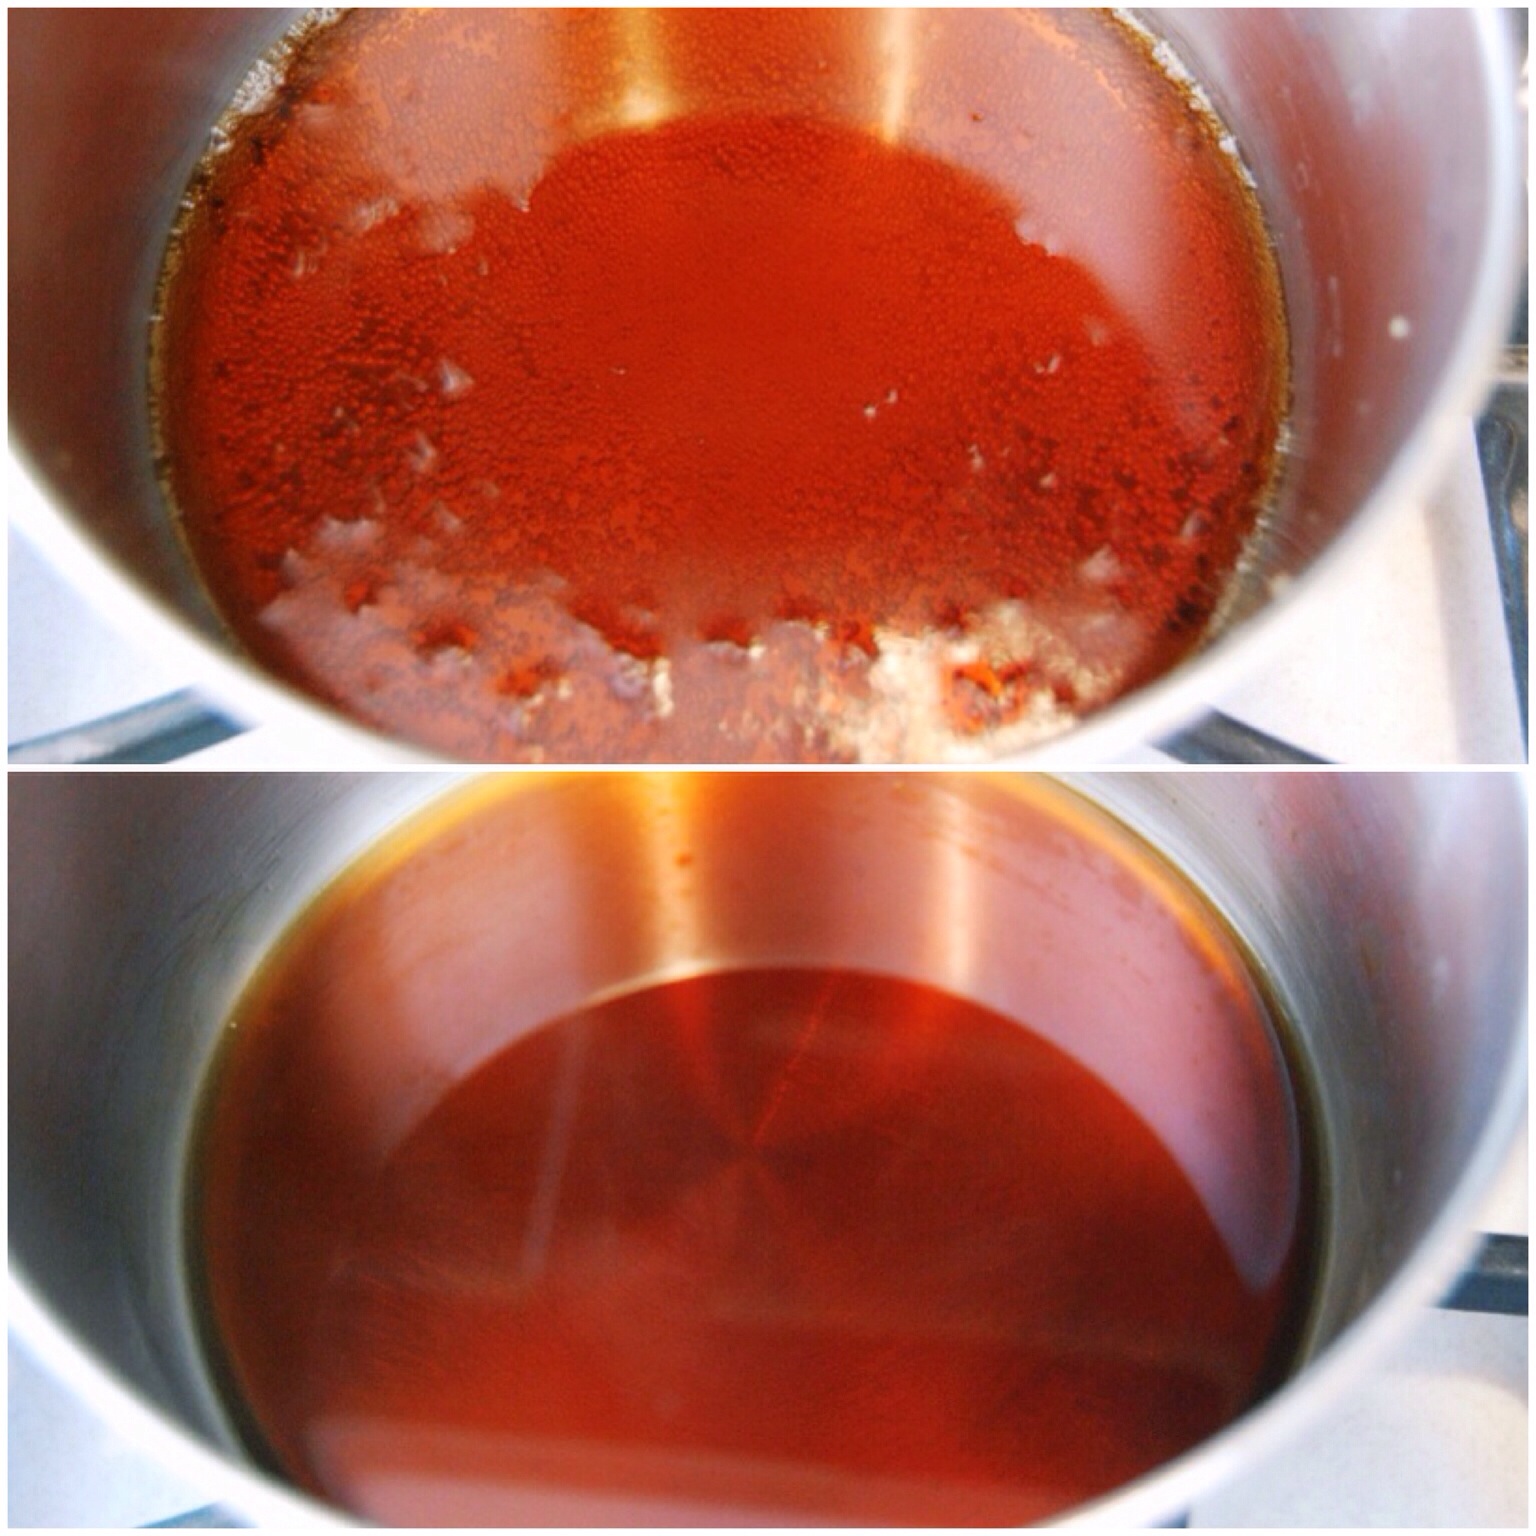
It will look like this. Turn off burner. Allow to cool.

IMG_9699.JPG

Now that the cakes are cool, you are going to brush the cake layers evenly with the 3 Tbsp. of reserved root beer (not the reduced stovetop product! That is for the frosting) with a basting brush. Yep. Give the two lovers a wet root beer kiss.

Melt white chocolate (I put mine in a bowl and microwave for thirty second intervals, stirring each time. Usually takes 90 seconds to melt).

In your stand mixer or with your hand mixer in a bowl, beat together softened butter and powdered sugar until fluffy about two minutes. Add salt and mix. Add white chocolate and beat for a few seconds until incorporated. Add reduced stovetop root beer, and vanilla extract and blend until smooth.

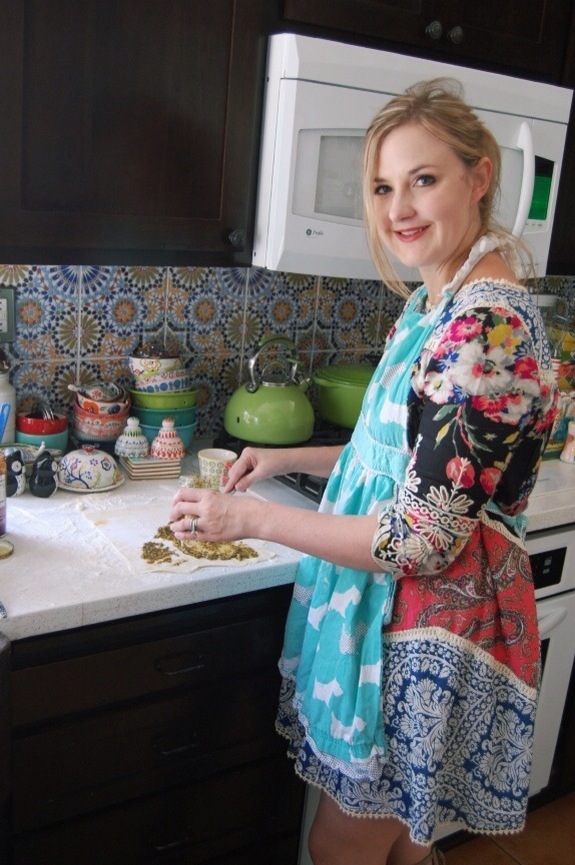
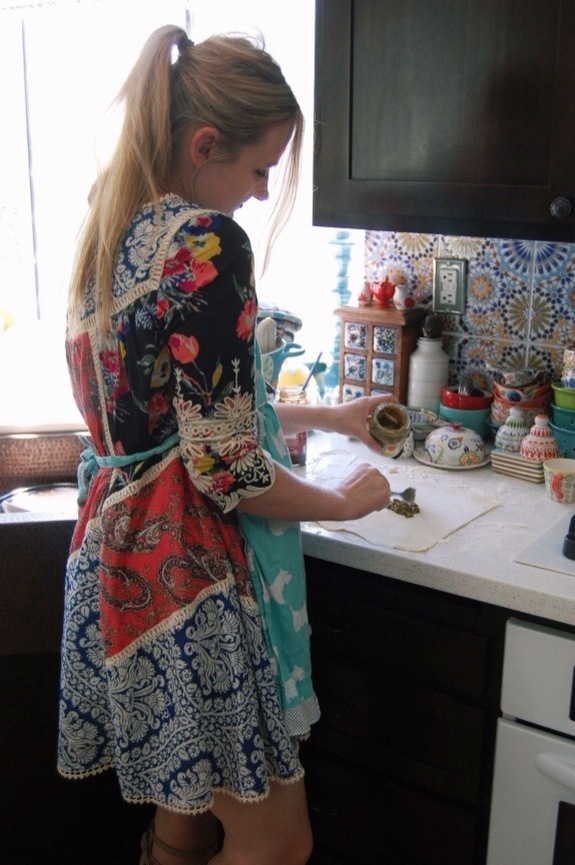
I, very helpfully, do not have a picture of this part. I do, however, have a picture of me posing with the frosting. Which I have been told has nothing to do with is very important when baking a cake.

IMG_9705.JPG

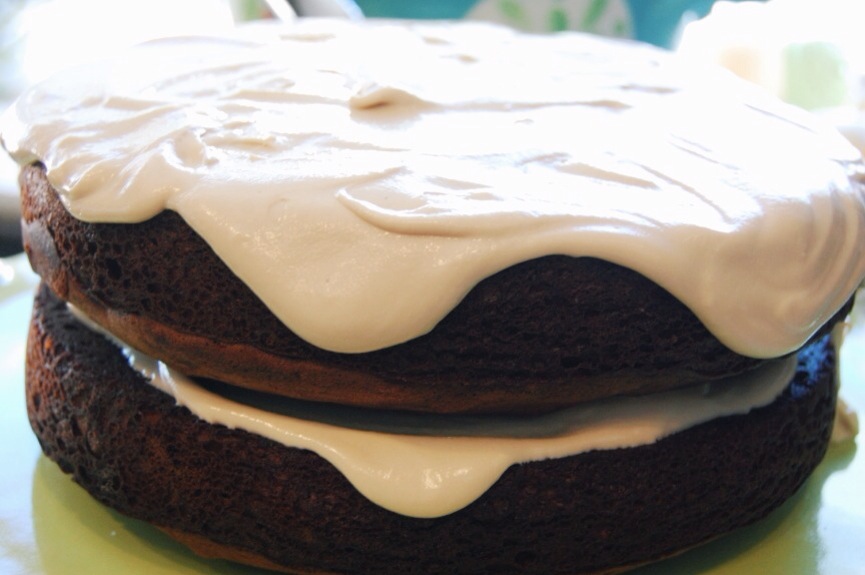
Place one cake round with basted root beer side up on a cake stand. Spread one third of the frosting on the layer towards the middle, leaving a little room at the edges because when you put the other cake layer on top, it will push the frosting further out.

IMG_9696.JPG

Place the other cake layer on top of the frosted bottom layer. Frost top with remaining frosting. I like to place it in the middle and then gently ease it towards the edge until it barely goes over.

Cover or immediately serve.

Now eat the mingled lovers. Why does something that sounds so wrong taste so right? Don’t try to analyze it, just enjoy.

IMG_9703.JPG

My daughter has requested this cake as her birthday cake coming up in October. She doesn’t even usually like cake. My husband woke me up the day after I had made this at 9:00 in the morning holding a plate with a half eaten large slice of the cake that he could not resist for breakfast (this is not a breakfast cake. He just has as much self control as his wife). Maybe he was feeling the ingredient love.

IMG_9678.JPG

I promise, a bite of this cake , and you will feel the romance, too.

P.S. My Giveaway ends tonight at 9:00 PST. Please do not forget to enter.

Savory Palmiers

20140820-132832-48512975.jpg

Sounds fancy, doesn’t it?

The other day, was my friend’s birthday. And what she wanted for her birthday was to go to a local winery and have a potluck picnic with some of her girlfriends. I wondered what I should bring, but then it hit me.

Enter the palmier.

That sounds like an elaborate made-up foreign boyfriend who drives a Porsche and only drinks champagne as he serenades you with a poem that he just wrote about the way you two first met… Which incidentally, you lied about, too.

But Palmier doesn’t need to know that.

Ahem.

Getting back on track.

Palmiers might sound complicated, but you can use all store bought ingredients and whip up a beautiful little boyfriend appetizer that nobody would ever guess took you less than fifteen minutes to create. The palmiers are flaky and melt in your mouth as they burst with different flavors.

We are making two different types of palmiers here. One is Ina Garten’s Recipe using pesto, feta, and sundried tomatoes. The other palmier is one that I created. It is more of a pizza roll using cream cheese, pizza sauce, mozzarella cheese and sun-dried tomatoes. When I make these I freeze half and then I have an appetizer or spare dinner when I need it. Each log makes about twenty to twenty five palmiers depending upon how thin you slice them.

Ingredients For Pesto Palmiers:

1 package frozen puff pastry
1/4-1/3 cup sun-dried tomatoes in olive oil
1/2 cup of crumbled feta
1/2 cup store bought pesto
1/2 cup flour

Ingredients for Pizza Palmiers:

1 package frozen puff pastry
2 cups mozzarella shredded cheese
8 oz. softened cream cheese
1/2 cup pizza sauce
1/4-1/3 cup sun-dried tomatoes in olive oil
1/2 cup flour

Optional:

Chopped pepperoni

Directions:

20140820-122419-44659705.jpg

Let frozen pastry defrost on counter for twenty-thirty minutes.

Preheat oven to 400 degrees F.

Lightly flour your counter and place one pastry sheet on floured surface. Lightly flour pastry surface and roll with a rolling pin into a 9 X 11 inch rectangle.

20140820-122330-44610296.jpg

20140820-122256-44576237.jpg

For the pesto palmiers, layer 1/2 of the ingredients per pastry sheet: first the pesto, then sun-dried tomatoes, then feta.

20140820-122450-44690315.jpg

For the pizza palmiers, layer 1/2 the ingredients per pastry sheet: first the cream cheese, then pizza sauce, sun-dried tomatoes, and mozzarella. You could also cut up some pepperoni and place that in, too. I happen to not like pepperoni, so I do not add it.

20140820-122646-44806493.jpg

When all of the ingredients are layered, take half of the long length of the palmier and fold it in half towards the center. Repeat with the other side until they are touching. Then fold again until the pastry dough is halfway to the center. Repeat with other side so that the two sides meet in the middle again. Whew.

Does your roll look like this?

20140820-122725-44845866.jpg

Or this? Yesterday I made these for my daughter, because she got her braces off and this is what she requested for dinner (these are one of her favorite things I make). The appetizer makes a great fun dinner option served family style in the middle of the table alongside a separate bowl of salad. I accidentally folded mine horizontally yesterday. So, if your roll looks like the ones above, that is okay. You just will not have as many palmiers at the end, but you will have bigger ones. If you want bigger palmiers, fold the pastry sheet width wise. If you want a larger quantity of small appetizers, fold length wise.

20140820-131441-47681602.jpg

Wrap in plastic wrap. If you have made both types of palmiers, you will have four rolls. Refrigerate until needed. You can make these the day before a party and have them on hand. Freeze for thirty minutes before cutting to make cutting easier. Freeze remaining logs (I only use one log of each type of palmier for each event) and just defrost them the next time you need a quick appetizer.

20140820-122815-44895137.jpg

After taking palmier logs out of the freezer, cut palmiers into 1/4 inch slices and place on a parchment lined baking sheet (the parchment is important. I have tried making these without the parchment paper and just cooking spray and the palmiers stick) two inches a part. I do not have a picture of that. I do, however, have a picture of my back. Isn’t that vain helpful?

20140820-123415-45255483.jpg

Bake sliced palmiers for 17-19 minutes. Mine are never as pretty as Ina’s, but they taste good.

Transfer the hot palmiers to a paper towel lined plate and allow to cool before placing on a platter to serve.

20140820-123450-45290096.jpg

Now celebrate your hard work with some champagne alongside Palmier before he takes you for a ride in that Porsche. If he tries to serenade you with another one of his cheesy poems, just shove one of these babies in his mouth. Your ears and your mouth will thank you.

*I could not help sneaking some pictures of my new dress into this post. Blame the champagne Palmier. He told me to do it. Dress is from Anthropologie here.

Honey Vanilla Ice Cream

20140626-124736.jpg

The summers of my youth could be described in three flavors. Grape juice, cheddar cheese and homemade honey vanilla ice cream. Being from a long line of beekeepers meant that my family had learned to incorporate the very nectar of their labors into almost every food they ate.

I have mentioned that as a young child, a spoonful of honey was a snack. A few drops of pollen, a special treat.

But nothing compared to my grandma’s honey ice cream. And nothing ever will.

I have tried to replicate it the best I could. I also wanted to make it a bit less rich. I believe my grandmother used mostly cream. I decided to use half milk. Half cream.

If you have never had honey ice cream, well, I don’t know if you should try it now. You will never go back. It is that good.

Seriously knees-dropping-to-the-ground-as-you-pay-homage-to-a-passing-bee good.

The person who invented the saying “you’re the bee’s knees,” may or may not have been referring to this phenomenon after just having eaten honey ice cream.

I mean, that makes sense right?

Well, it makes more sense than comparing someone to bee’s knees. Which, while they are quite cute and fuzzy for knees, do not come close to comparing to this treat.

Let’s make some heaven!

Ingredients:

2/3 cup honey
2 cups milk
2 cups heavy whipping cream
1 tsp. vanilla extract
Caviar from one vanilla bean
5 egg yolks

Directions:

Pour your milk and cream into a large pot on the stove. Add your honey. Turn heat to medium-low.

While that is heating up, separate five egg yolks. Whisk the egg yolks for two minutes continuously. Or bust out your stand mixer if you have one. And let it do the work for you on medium speed for two minutes.

20140626-124836.jpg

Add the caviar of a vanilla bean to the steeping milk mixture. Whisk. When milk mixture comes to a light boil, turn heat to low. Very slowly add a ladleful (about 1/2 a cup) to the egg yolks while you whisk them. Now add that mixture back into the hot milk mixture. With a wooden spoon, stir continuously until the mixture begins to thicken. This should be about three minutes.

Turn heat off. Strain mixture through a fine mesh strainer. Add vanilla extract. Stir.

Cover bowl and refrigerate at least two hours to overnight.

20140626-124807.jpg

Follow your ice cream maker’s churning instructions. For my machine, I simply dump in the chilled ingredients.

20140626-125008.jpg

Freeze your ice cream in a freezer-safe container. And then indulge the next day. I like mine covered in Trader Joe’s Fudge Sauce.

20140626-124914.jpg

I warn you. You will never look at vanilla ice cream the same way again.

Or a bee for that matter.

Now let’s get some padding for those knees.

20140626-211706.jpg

*I adapted the vanilla ice cream recipe that came with my Cuisinart Ice-100 (a super fancy name for a big ol’ ice cream maker. The link is an affiliate link) to incorporate honey. Seriously, next time your husband makes the brilliant mistake of not asking for anything for Christmas, you might want to get him one of those babies. I might love it more than David Beckham.