Savory Palmiers

20140820-132832-48512975.jpg

Sounds fancy, doesn’t it?

The other day, was my friend’s birthday. And what she wanted for her birthday was to go to a local winery and have a potluck picnic with some of her girlfriends. I wondered what I should bring, but then it hit me.

Enter the palmier.

That sounds like an elaborate made-up foreign boyfriend who drives a Porsche and only drinks champagne as he serenades you with a poem that he just wrote about the way you two first met… Which incidentally, you lied about, too.

But Palmier doesn’t need to know that.

Ahem.

Getting back on track.

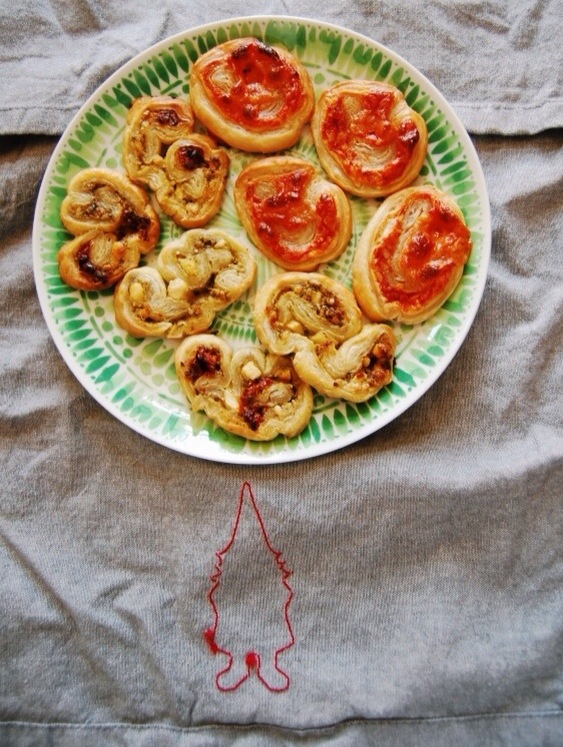
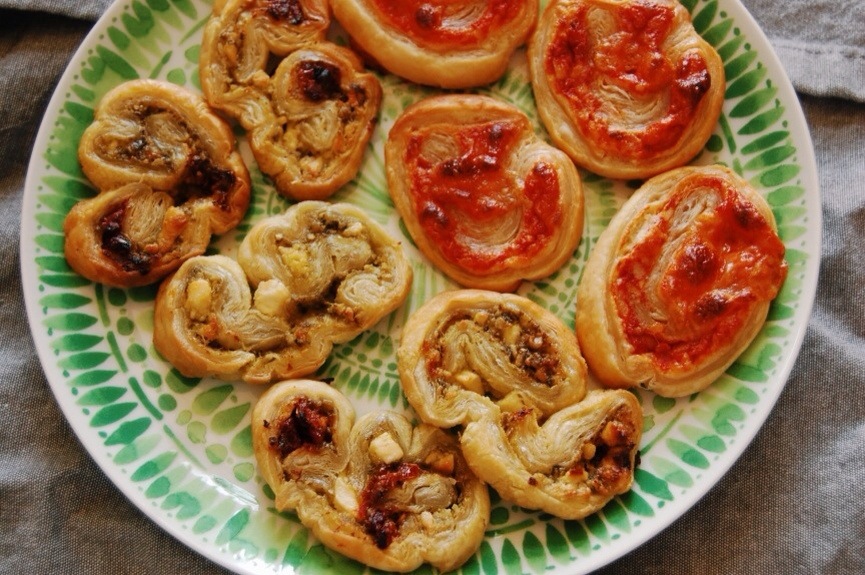
Palmiers might sound complicated, but you can use all store bought ingredients and whip up a beautiful little boyfriend appetizer that nobody would ever guess took you less than fifteen minutes to create. The palmiers are flaky and melt in your mouth as they burst with different flavors.

We are making two different types of palmiers here. One is Ina Garten’s Recipe using pesto, feta, and sundried tomatoes. The other palmier is one that I created. It is more of a pizza roll using cream cheese, pizza sauce, mozzarella cheese and sun-dried tomatoes. When I make these I freeze half and then I have an appetizer or spare dinner when I need it. Each log makes about twenty to twenty five palmiers depending upon how thin you slice them.

Ingredients For Pesto Palmiers:

1 package frozen puff pastry
1/4-1/3 cup sun-dried tomatoes in olive oil
1/2 cup of crumbled feta
1/2 cup store bought pesto
1/2 cup flour

Ingredients for Pizza Palmiers:

1 package frozen puff pastry
2 cups mozzarella shredded cheese
8 oz. softened cream cheese
1/2 cup pizza sauce
1/4-1/3 cup sun-dried tomatoes in olive oil
1/2 cup flour

Optional:

Chopped pepperoni

Directions:

20140820-122419-44659705.jpg

Let frozen pastry defrost on counter for twenty-thirty minutes.

Preheat oven to 400 degrees F.

Lightly flour your counter and place one pastry sheet on floured surface. Lightly flour pastry surface and roll with a rolling pin into a 9 X 11 inch rectangle.

20140820-122330-44610296.jpg

20140820-122256-44576237.jpg

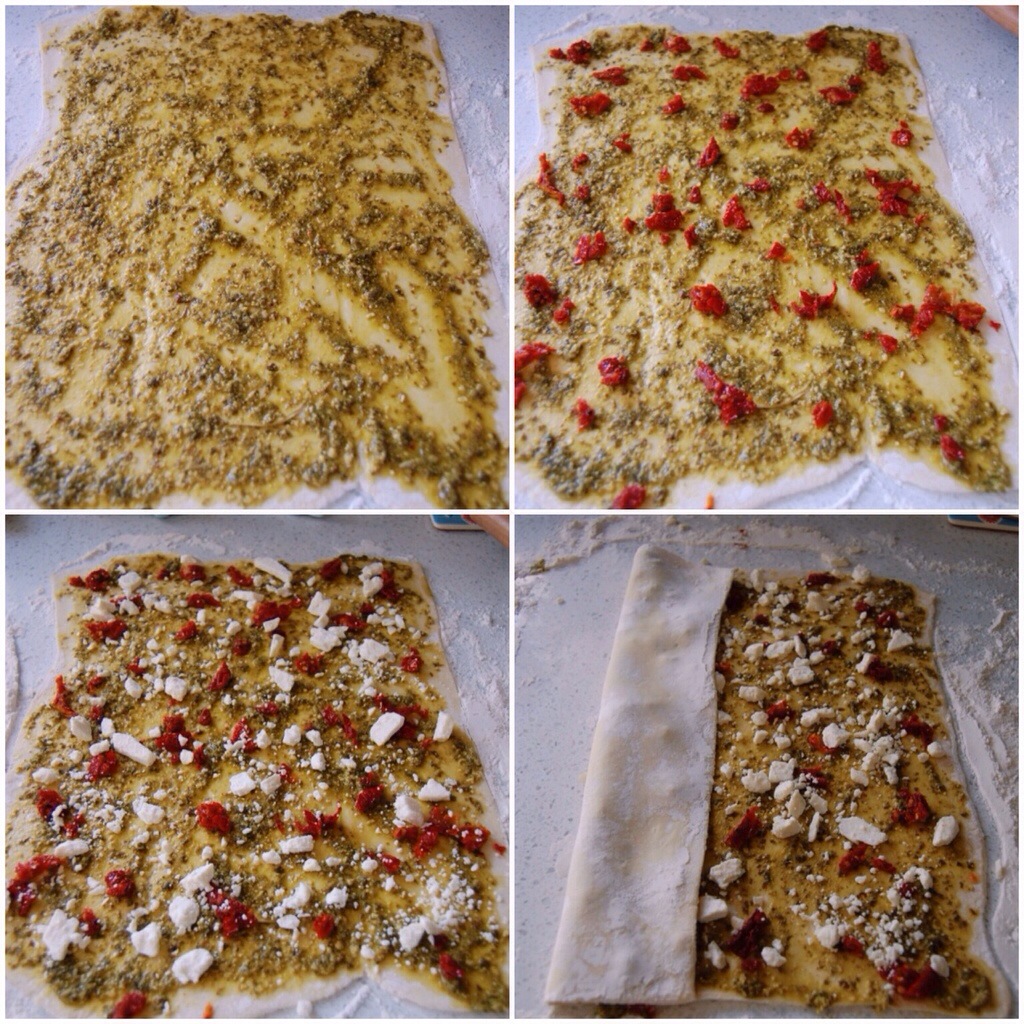
For the pesto palmiers, layer 1/2 of the ingredients per pastry sheet: first the pesto, then sun-dried tomatoes, then feta.

20140820-122450-44690315.jpg

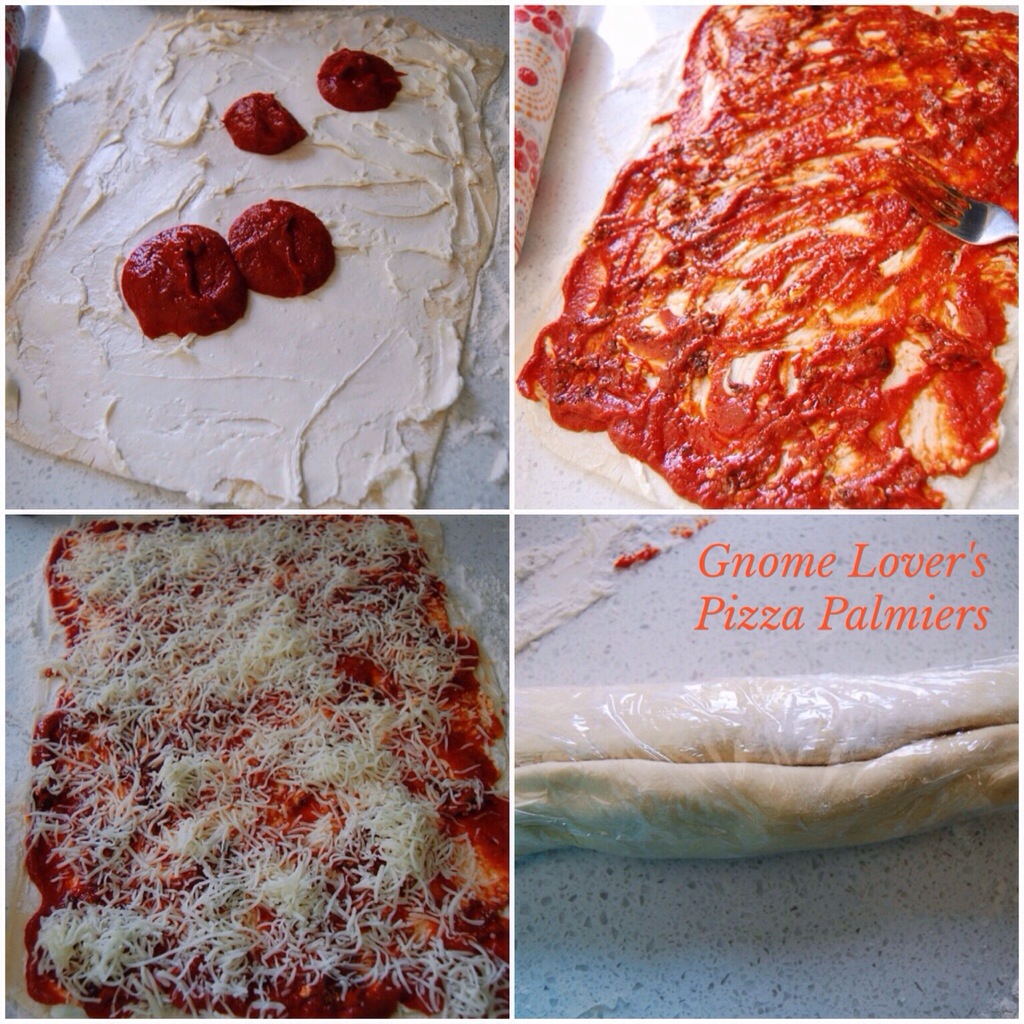
For the pizza palmiers, layer 1/2 the ingredients per pastry sheet: first the cream cheese, then pizza sauce, sun-dried tomatoes, and mozzarella. You could also cut up some pepperoni and place that in, too. I happen to not like pepperoni, so I do not add it.

20140820-122646-44806493.jpg

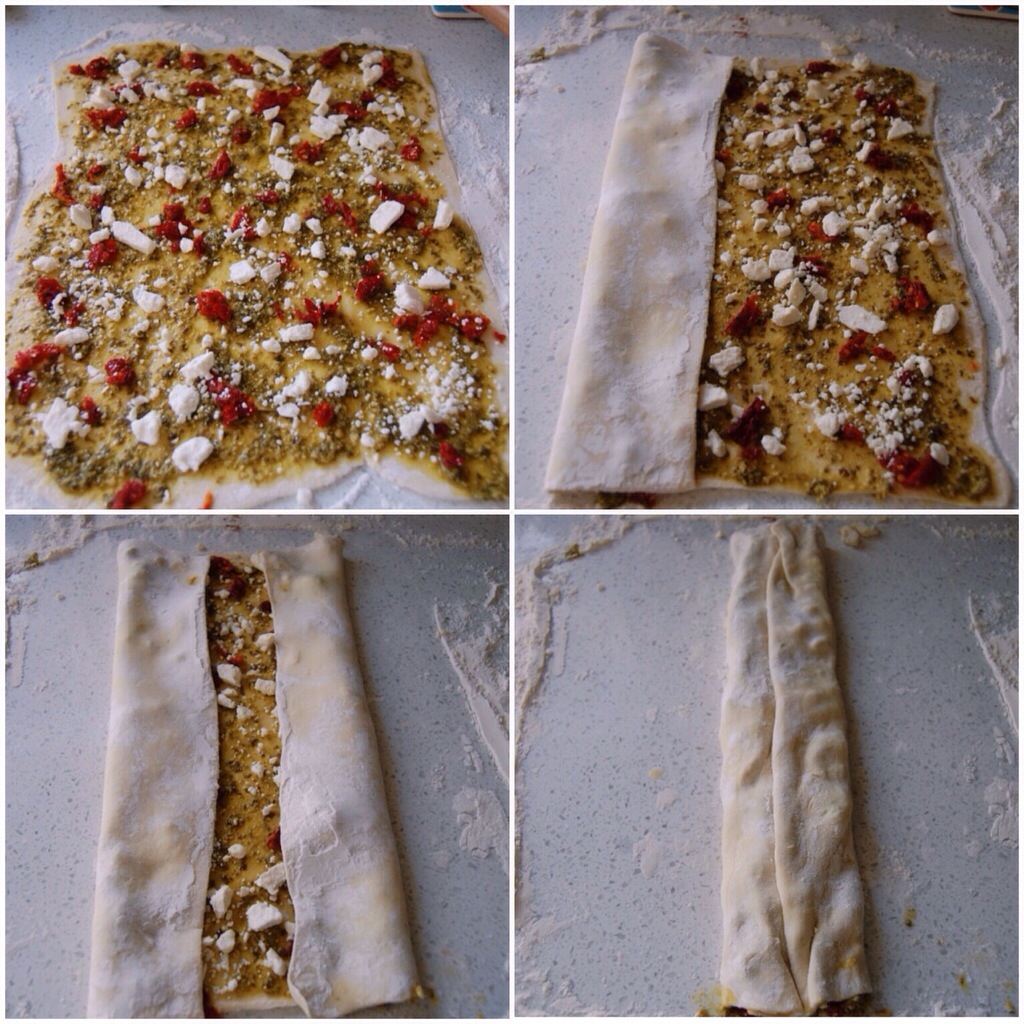
When all of the ingredients are layered, take half of the long length of the palmier and fold it in half towards the center. Repeat with the other side until they are touching. Then fold again until the pastry dough is halfway to the center. Repeat with other side so that the two sides meet in the middle again. Whew.

Does your roll look like this?

20140820-122725-44845866.jpg

Or this? Yesterday I made these for my daughter, because she got her braces off and this is what she requested for dinner (these are one of her favorite things I make). The appetizer makes a great fun dinner option served family style in the middle of the table alongside a separate bowl of salad. I accidentally folded mine horizontally yesterday. So, if your roll looks like the ones above, that is okay. You just will not have as many palmiers at the end, but you will have bigger ones. If you want bigger palmiers, fold the pastry sheet width wise. If you want a larger quantity of small appetizers, fold length wise.

20140820-131441-47681602.jpg

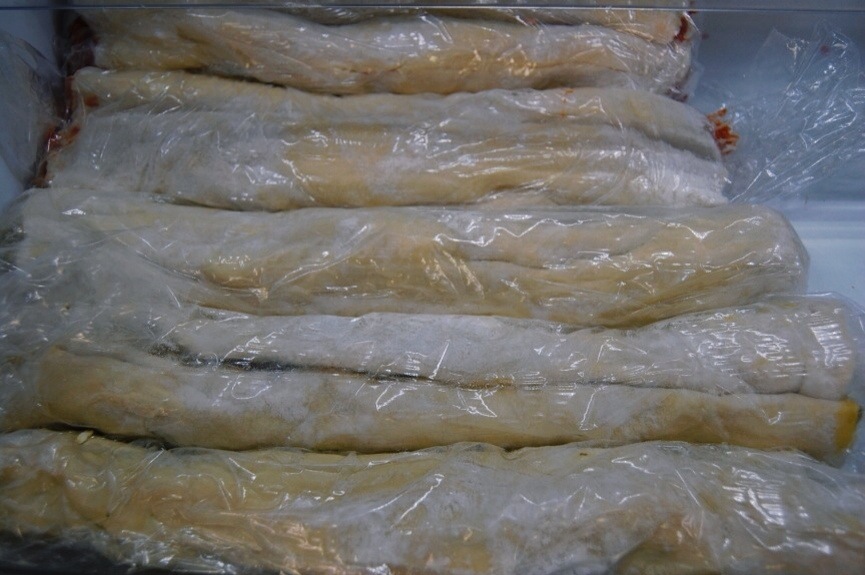
Wrap in plastic wrap. If you have made both types of palmiers, you will have four rolls. Refrigerate until needed. You can make these the day before a party and have them on hand. Freeze for thirty minutes before cutting to make cutting easier. Freeze remaining logs (I only use one log of each type of palmier for each event) and just defrost them the next time you need a quick appetizer.

20140820-122815-44895137.jpg

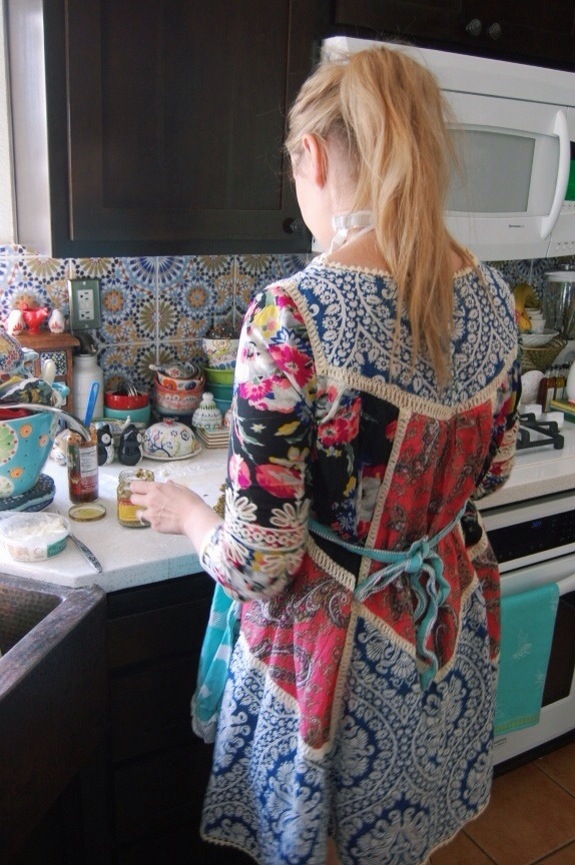
After taking palmier logs out of the freezer, cut palmiers into 1/4 inch slices and place on a parchment lined baking sheet (the parchment is important. I have tried making these without the parchment paper and just cooking spray and the palmiers stick) two inches a part. I do not have a picture of that. I do, however, have a picture of my back. Isn’t that vain helpful?

20140820-123415-45255483.jpg

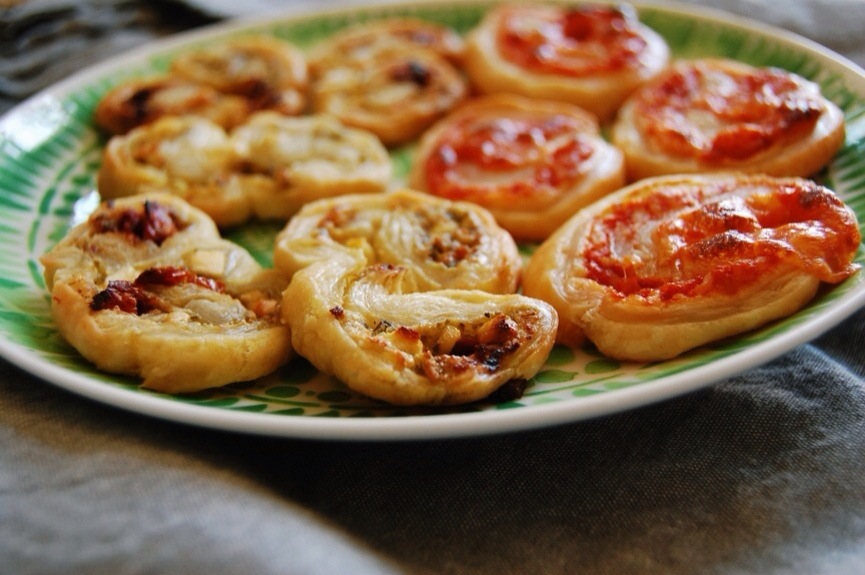
Bake sliced palmiers for 17-19 minutes. Mine are never as pretty as Ina’s, but they taste good.

Transfer the hot palmiers to a paper towel lined plate and allow to cool before placing on a platter to serve.

20140820-123450-45290096.jpg

Now celebrate your hard work with some champagne alongside Palmier before he takes you for a ride in that Porsche. If he tries to serenade you with another one of his cheesy poems, just shove one of these babies in his mouth. Your ears and your mouth will thank you.

*I could not help sneaking some pictures of my new dress into this post. Blame the champagne Palmier. He told me to do it. Dress is from Anthropologie here.

It’s The Little Things: All Wrapped Up

20131211-164822.jpg

I am going to just come out and say it: I don’t like the typical holiday wrapping paper.

Oh no! I am beginning to sound like Scrooge! First the poor elf, now cute paper? What’s next? Santa’s suit?

Weeeeeellllllll…

Just kidding. His suit is perfection.

Anyway, back to the cutesy paper: That is not to say it does not end up in our house. Santa Claus has an affection for the stuff and he loves to give the kids their gifts covered in outlandish cartoon wrapping paper.

But for my presents under the tree, I like to keep it streamlined.

Usually this = a disaster.

Years and years ago, I wrapped all of my presents in brown kraft paper. It was so pretty under the tree. But then it happened… Presents started being exposed left and right as the tape popped off of the heavy paper.

I learned my lesson.

Or did I?

After that came the year of the all-white wrapping paper. Again, pretty, but very expensive.

Then there was the year of the fabric. Combine all of the problems I had with the brown kraft paper and the expense of the white paper and imagine this headache.

So, I caved. I bought the wrapping paper that I did not like. And I endured.

Heroic.

20131211-164852.jpg

But this year I had an idea. I stole into my daughter’s room and I snatched her giant roll of white drawing paper from Ikea off of her desk (if you have not used something in our house within a year, it becomes fair game. Meaning: it reverts back to being Mommy’s. Seems fair, right? Oh, and this rule does not in any way apply to Mommy). I began to wrap presents in it.

It still needed something.

20131211-164934.jpg

Every year I buy rolls of beautiful ribbon from Costco. They come in rolls of 50 yards for $7. This is an unbelievably fantastic price.

20131211-212759.jpg

I wrapped my presents in different colored bows.

And I was happy.

For the larger presents (like the ice cream maker I purchased for myself my husband because I he always wanted one), I am using gold and silver wrapping paper.

It’s the little things: beautifully wrapped presents under the tree.

Now, if only I could get someone to wrap them for me.

Any takers?

I think I know of an elf who might be available.

20131211-222646.jpg

P.S. I shared this on Savvy Southern Style.

And My Romantic Home

“It Tastes Like A Cinnamon Roll” Cake

20131006-201509.jpg

This cake is actually called “Honey Bun Cake.” However, after eating a bite of this cake, my child exclaimed, “it tastes like a cinnamon roll.” And you know what? It kind of does.

But better.

This cake began when I was looking around for a recipe with honey in it to try. I was feeling guilty that my father is a beekeeper, and yet, I rarely cook with honey. I found this cake. After glancing at the recipe I realized that there is no honey in the ingredients. But it looked delicious. I HAD to make it. I found two versions of it that varied slightly. I figured I would just combine them to my liking. I used the cake portion from this Betty Crocker Recipe and the glaze is from Michelle’s Honeybun Cake on All Recipes. It worked out perfectly.

Yum!

This cake was incredibly easy to make. It smells like fall to me. Cinnamony and warm.

Ingredients

1 box yellow cake mix
4 eggs
2/3 cup vegetable oil
1 cup sour cream (8 oz.)
1 cup brown sugar
2 tsp. cinnamon
2 cups powdered sugar
1/4 cup milk
1 tsp. vanilla extract

Grease a 9 X 13 pan. Set aside.

Preheat your oven to 350 degrees or 325 degrees convect bake (if you have a convection oven)

20131006-200836.jpg

Pour cake mix, vegetable oil, and sour cream into a bowl. Mix in your mixer or with a hand mixer just until it is all incorporated. Now mix in each egg and combine until batter is smooth.

20131006-200934.jpg

In a separate small bowl mix together brown sugar and cinnamon.

20131006-200905.jpg

Pour half of the batter evenly in your greased 9 X 13 baking dish.

20131006-201004.jpg

Sprinkle brown sugar mixture evenly over top.

20131006-201026.jpg

Pour remaining batter over cinnamon mixture. This is the tricky part. Carefully spread the batter so that the cinnamon mixture is not getting incorporated in the batter. Do this until the top layer is even.

Put in the oven and bake 45 minutes.

20131006-201051.jpg

Remove from oven.

20131006-201134.jpg

Immediately mix powdered sugar, milk, and vanilla in a bowl with a fork.

20131006-201202.jpg

When it is runny, prick numerous holes in your warm cake with a fork.

20131006-201301.jpg

Pour glaze over cake evenly.

20131006-201426.jpg

20131006-201651.jpg

20131006-201609.jpg

Allow cake to completely cool (about 45 minutes) and then indulge! I cut our cake after thirty minutes. That was as patient as we could be. It smelled so good. It was also an hour before dinner. Maybe not the right choice, but definitely the right loveliness for our mouths.

20131006-201734.jpg

My husband said, “I might like this better than peach cake!” Being that peach cake is his very favorite, I will take it that this recipe is a keeper.

Enjoy! (We did with ice cold glasses of milk.)