Chess Squares

20140813-142417-51857258.jpg

I do not know why, but I want to say the name of this recipe in the way Spongebob would do it. Okay, I do know why. It is because his last name is Squarepants and the title has the word “square” in the name.

Don’t leave me hanging. Let’s do it together in a nasally twang, shall we?:

“Cheeeeeesss Squuuuuuuuaaaaarres.”

Whew! I feel better. Although, any recipe that starts with a paragraph about a children’s cartoon and then proceeds to use the verse, “nasally twang” generally isn’t something that wets one’s appetite. Sorry about that.

20140813-142323-51803873.jpg

I had first seen this recipe on Pinterest and then looked it up on the internet. I found it on so many sites, with no one really knowing where the recipe originally came from. I followed the Duncan Hines’ version, but used butter instead of margarine.

I generally do not post directions if it is not my recipe, but in this case I will. I needed to mention a few tips in the directions below that were not found in the recipe I followed. This is not my original recipe. It is someone else’s. Perhaps a certain sponge’s who dwells under the sea?

Ingredients:

1 package of yellow cake mix
3 eggs
1 stick of melted salted butter
8 oz. of softened cream cheese
1 pound (16 oz.) powdered sugar

Directions:

20140813-141626-51386223.jpg

Preheat oven to 350 degrees F. If you have a convection oven then preheat to 325 degrees F.

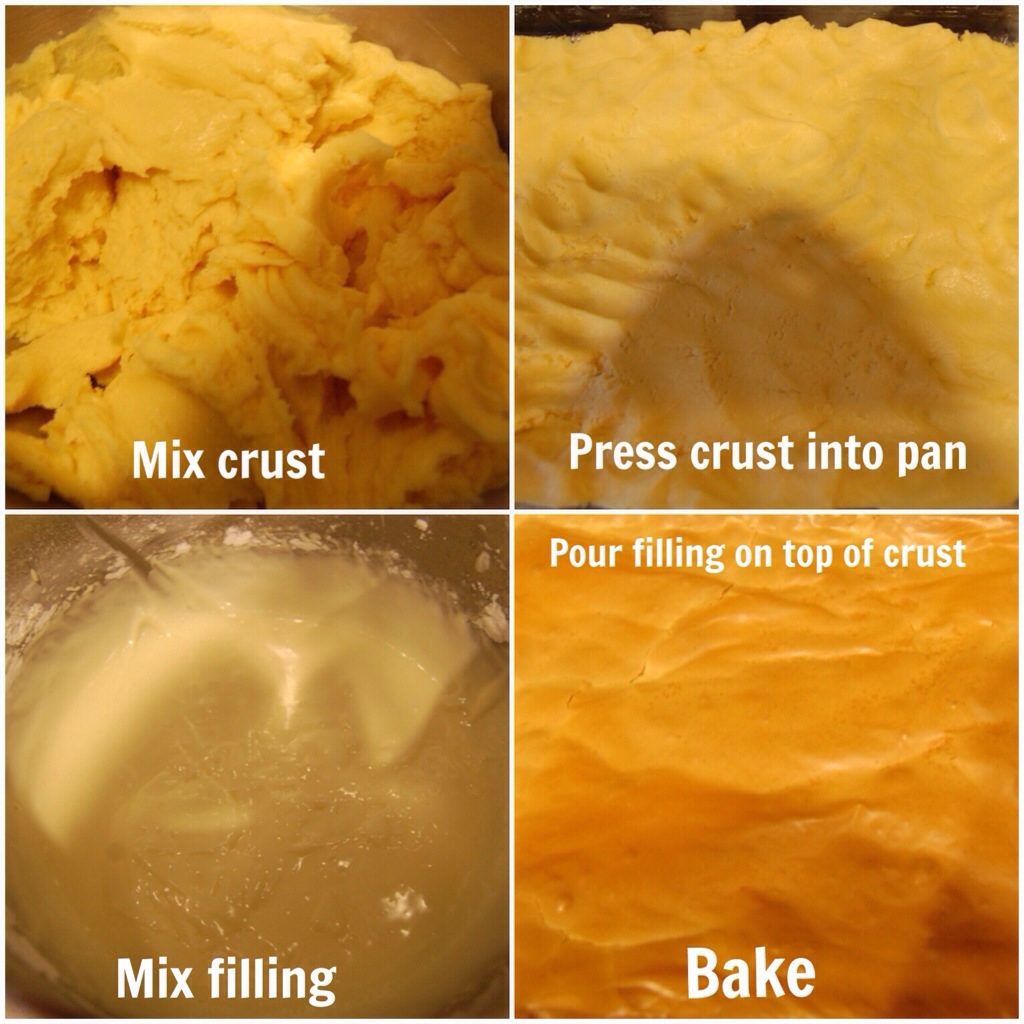
In a stand mixer or with a hand mixer in a bowl, beat together one egg, cake mix and melted butter.

Press the dough into a greased 9 X 13 baking dish. I like to use a clear one, because it is pretty seeing the different layers.

Set aside 1/4 cup of the powdered sugar.

Combine the remaining powdered sugar, two eggs and cream cheese in your stand mixer or in a bowl with your hand mixer on medium speed until all ingredients are thoroughly mixed together.

Pour the mixture over the dough in the 9 X 13 pan.

Bake for thirty five minutes.

20140813-141836-51516811.jpg

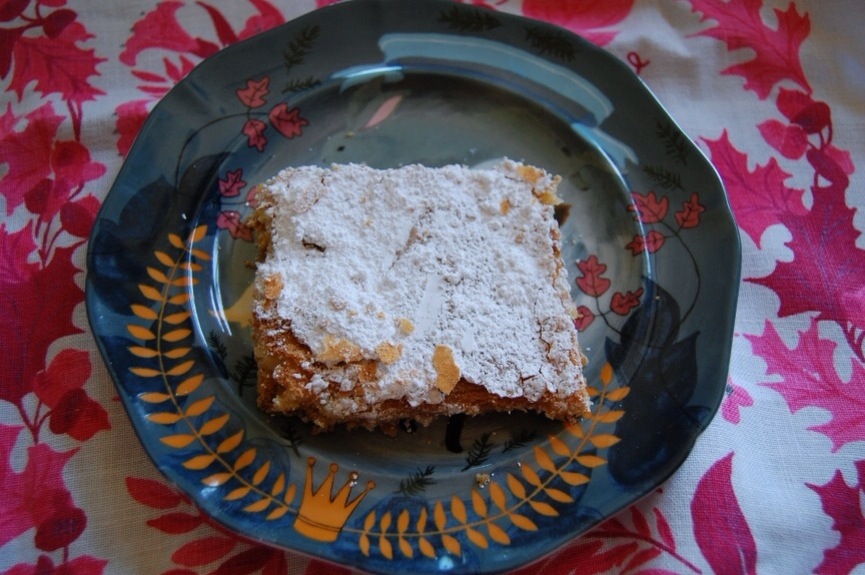
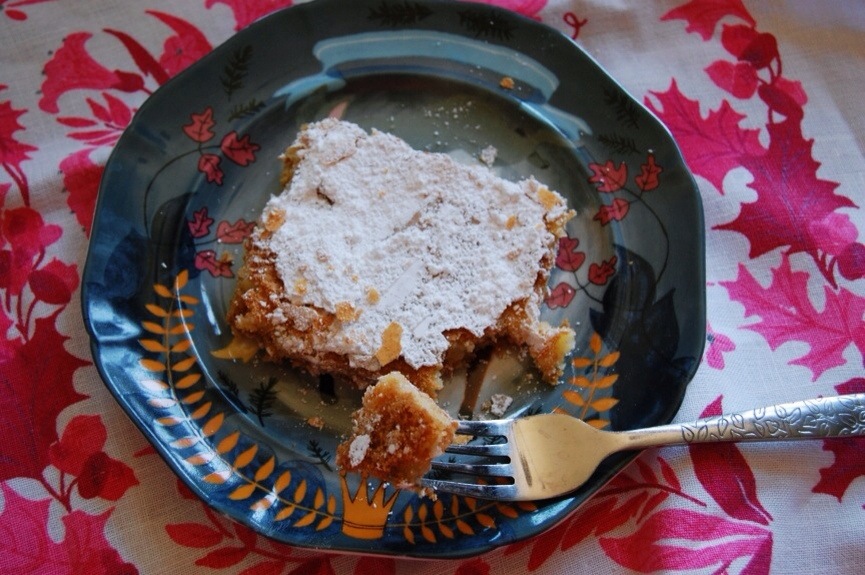
Remove from the oven and let cool for forty five minutes. Sprinkle the powdered sugar you set aside earlier over the dessert.

20140813-141944-51584845.jpg

Check.

Cut into squares.

Check.

Serve (refrigerate remaining dessert).

Checkmate.

Crown yourself King Of The Sea and keep this yummy indulgence away from Patrick and Mr. Krabs. You will not want to share this.

Baked Potato Casserole

Everyone should have certain go-to recipes that they can make quickly and feed a crowd. I feel it is important to always have a great potato recipe in your bag of tricks, especially for potlucks.

I found mine when I was thirteen.

My uncle’s best friend married a woman named Tara. Tara would bring this recipe to every Thanksgiving at my grandma’s house. I was one of Tara’s bridesmaids when I was thirteen.

20140722-203416.jpg

I made this recipe for my husband when we first started dating. And continued to do so for the next few months. In fact, this recipe was the basis for our very first fight. Do you want to hear about it or should I get right to the recipe? Oh, you want to see the recipe. Well, just skip this part then. I’m going to tell you anyway:

Sixteen years ago my husband and I were at the grocery store buying the ingredients for this dish. I started to grab eight potatoes. My husband (fiancé at the time) made a grievous error. He decided to question my reasoning.

I know.

He understands now that there is no reasoning with me. Because I have no reason.

Or rhyme, as it were.

“It’s just the two of us. Why do we need eight potatoes?”

“Because that is what the recipe calls for.”

“But why can’t we cut the recipe in half?”

“BECAUSE IT DOESN’T SAY TO!” Then I burst into tears and ran from the store. In my defense we learned I was pregnant later that day and so I like to think it was simply the hormones and not a weird irrational need to bake eight potatoes.

After that fight, I stubbornly never made this dish again until this month.

Sixteen years really isn’t so long.

At least in potato years.

Every marriage should be measured in potato years.

Let’s just get to the recipe. If you are making this you are going to want to prepare the baked potatoes well in advance of using them. So, time accordingly.

This recipe is so easy. I changed the original recipe just a little. I like it, because you do not have to cut potatoes into small pieces or boil them. And, guess what? In the pictures I halved this recipe. If you are making this for a small family, I recommend doing that. For a crowd, I use the full recipe. Okay. So, he was right. Darn.

Ingredients:

8 large baking potatoes
4 Tbsp. Cold Butter
1 16 oz. container of sour cream (2 cups)
2 cups shredded cheddar cheese
1 1/2 – 2 tsp. salt (I use 1 1/2 tsp. first and then add an extra 1/2 tsp. if it needs it)
1/2 – 1 tsp. ground black pepper (depending on your preference)
2 Tbsp. finely chopped chives
2 Tbsp. Finely chopped green onions

Directions:

Preheat oven to 375 degrees.

20140722-203453.jpg

Wash potato. Dry potato. Pierce the potato with a fork two times and then wrap it up in foil. Repeat eight times.

Place the potatoes in the oven and bake for seventy five minutes. Once the potatoes are baked (give a slight squeeze, if it gives then it is ready, if not bake the potato a little longer), place the potatoes still in their foil in your refrigerator to cool. Turn off oven. They need to cool for at least three hours, but I often cool them overnight so they are ready the next day.

Take potatoes out of the refrigerator.

Preheat oven to 350 degrees.

20140722-203525.jpg

Remove foil and simply peel or cut the skin off of the potato. I just cut off each end and then cut the skin off. This is easy and quick.

Place in your mixing bowl for your stand mixer or in a bowl to beat with your hand mixer.

Beat potatoes on low setting (if you do it higher, potatoes will go everywhere). Add sour cream and beat on low for thirty seconds and then turn to medium speed. Add salt, pepper, chives, cheese and green onions. Beat for a few minutes until potatoes are broken down and all of the ingredients are incorporated. There will still be small chunks of potatoes, but not large ones.

20140722-203622.jpg

Pour potato mixture into a baking dish and smooth so it is even. Cut butter into small pieces.

20140722-203709.jpg

Dot the top of the potatoes with the butter.

20140722-203737.jpg

Place uncovered in the oven and bake for 30-35 minutes until edges are bubbling.

20140722-203857.jpg

Serve the potatoes.

And store marriage in a cool, dark place until ready to handle again.

P.S. I shared this on Savvy Southern Style.

And My Romantic Home.

Breaking Bread

20140710-110111.jpg

Gosh. I hope I didn’t really break the bread. I hope I just made a nice easy cut. Sawed it back and forth. Then ate it. Is that worse than simply breaking it? I am sure it didn’t feel a thing.

When I am feeling down, nothing makes me feel better than baking or cooking (and no, I do not think you have to be good at one or the either. That makes no sense at all). Just making something. Forming something from simple ingredients into a wondrous treat makes my whole heart heal.

And if nothing else, it gives me calories to burn while I cry. Or laugh. Or both.

And of all of the baked goods, bread absorbs tears the best. At least, that’s what I’ve been told.

My mother-in-law once taught me her secret to perfect bread. And now I’m telling you. And since she is unaware that this little blog exists, you won’t tell her.

See how that works.

Her secret is substituting whatever liquid the bread recipe calls for with apple juice.

Trust me. It is divine.

But with this recipe having honey, I did not want to do all apple juice and make it too sweet, so I simply substituted a cup of apple juice for the original recipe’s full 2 1/2 cups milk. I very slightly adapted this recipe from Taste of Home.

And I loved it.

It wasn’t broken.

The end.

Oh, wait, I still have to teach you how to make it.

Ingredients:

1 1/2 cups milk
2 packets active dry yeast (1/4 oz. ea.)
2 tsp. salt
1/4 cup melted salted butter
1 cup apple juice
7 cups flour + 1/2 cup to spread on counter
1/3 cup honey

Directions:

Pour milk and apple juice in a microwave proof container

Microwave on high one minute. Stir. If the liquid is still not warm to the touch microwave for thirty seconds more (it will depend on the depth of your cup. I just measured milk to 1 1/2 cups and then apple juice to the very top of a two cup measuring cup. You want your liquid warm and not hot. If it is too hot, it will kill your yeast. My mother-in-law uses a thermometer. I use my finger. Again, she’ll neve’ know. But if you like to be precise, the temperature should be 115 degrees Fahrenheit.

20140710-111727.jpg

Dump yeast into your mixer. And yes, dump. Not pour. Why? Because “dump” is much more fun to say.

Pour (we can’t get carried away with the other word. It is about to get serious) milk/apple juice mixture in. Stir gently a few times. Let yeast activate for a few minutes (I get impatient. This is usually three minutes for me).

Pour in remaining ingredients. Pour the butter in last because you do not want the hot butter to kill the yeast.

20140710-111758.jpg

Knead six minutes on your floured surface (or use your dough hook on your stand mixer if you have one. Ditzy me did not realize what that was for until my friend came over and asked me why I just didn’t just use that instead of kneading it by hand. Thankfully my husband did most of the work, because I am a kneady). Form into a large dough ball.

20140710-111832.jpg

Grease round mixing bowl with butter.

Lay ball of dough in the bowl and then flip the dough once so that all sides of the dough are greased.

Turn oven on to its lowest setting for just two minutes. Do not let it get to a high temperature. Turn oven off. Place a damp dish towel over bowl of dough and place the bowl in the oven for an hour.

Make sure you leave plenty of room above the bowl for the dough to rise in the oven.

Remove bowl from the oven.

Remove the towel.

Punch dough in the middle. (The kids LOVE doing this).

20140710-110149.jpg

Dough will deflate. Form dough into two loaves (I just rip mine in half, channeling my inner Hulk and just pat that baby into shape) and place into two, greased with butter, 9 X 5 loaf pans.

Place pans in oven to rise for thirty minutes (it will still be warm enough to do this).

Remove pans from oven. Turn oven to 375 degrees. Bake bread for 15 minutes. After fifteen minutes cover the tops of the bread with foil and cook for another eighteen minutes.

Remove loaves from oven. Turn oven off. Remove foil.

20140710-110218.jpg

Turn loaves upside down onto a cooling rack one at a time and turn over so they are right side up again.

20140710-110245.jpg

Let cool thirty minutes before eating.

20140710-110342.jpg

I made the kids and myself a cute little table setting to eat our fresh homemade bread at. We all loved it. It created minimal clean up. And it definitely made the homemade bread feel much more special.

20140710-110410.jpg

I would say that is not broken at all.

Honey Vanilla Ice Cream

20140626-124736.jpg

The summers of my youth could be described in three flavors. Grape juice, cheddar cheese and homemade honey vanilla ice cream. Being from a long line of beekeepers meant that my family had learned to incorporate the very nectar of their labors into almost every food they ate.

I have mentioned that as a young child, a spoonful of honey was a snack. A few drops of pollen, a special treat.

But nothing compared to my grandma’s honey ice cream. And nothing ever will.

I have tried to replicate it the best I could. I also wanted to make it a bit less rich. I believe my grandmother used mostly cream. I decided to use half milk. Half cream.

If you have never had honey ice cream, well, I don’t know if you should try it now. You will never go back. It is that good.

Seriously knees-dropping-to-the-ground-as-you-pay-homage-to-a-passing-bee good.

The person who invented the saying “you’re the bee’s knees,” may or may not have been referring to this phenomenon after just having eaten honey ice cream.

I mean, that makes sense right?

Well, it makes more sense than comparing someone to bee’s knees. Which, while they are quite cute and fuzzy for knees, do not come close to comparing to this treat.

Let’s make some heaven!

Ingredients:

2/3 cup honey
2 cups milk
2 cups heavy whipping cream
1 tsp. vanilla extract
Caviar from one vanilla bean
5 egg yolks

Directions:

Pour your milk and cream into a large pot on the stove. Add your honey. Turn heat to medium-low.

While that is heating up, separate five egg yolks. Whisk the egg yolks for two minutes continuously. Or bust out your stand mixer if you have one. And let it do the work for you on medium speed for two minutes.

20140626-124836.jpg

Add the caviar of a vanilla bean to the steeping milk mixture. Whisk. When milk mixture comes to a light boil, turn heat to low. Very slowly add a ladleful (about 1/2 a cup) to the egg yolks while you whisk them. Now add that mixture back into the hot milk mixture. With a wooden spoon, stir continuously until the mixture begins to thicken. This should be about three minutes.

Turn heat off. Strain mixture through a fine mesh strainer. Add vanilla extract. Stir.

Cover bowl and refrigerate at least two hours to overnight.

20140626-124807.jpg

Follow your ice cream maker’s churning instructions. For my machine, I simply dump in the chilled ingredients.

20140626-125008.jpg

Freeze your ice cream in a freezer-safe container. And then indulge the next day. I like mine covered in Trader Joe’s Fudge Sauce.

20140626-124914.jpg

I warn you. You will never look at vanilla ice cream the same way again.

Or a bee for that matter.

Now let’s get some padding for those knees.

20140626-211706.jpg

*I adapted the vanilla ice cream recipe that came with my Cuisinart Ice-100 (a super fancy name for a big ol’ ice cream maker. The link is an affiliate link) to incorporate honey. Seriously, next time your husband makes the brilliant mistake of not asking for anything for Christmas, you might want to get him one of those babies. I might love it more than David Beckham.