
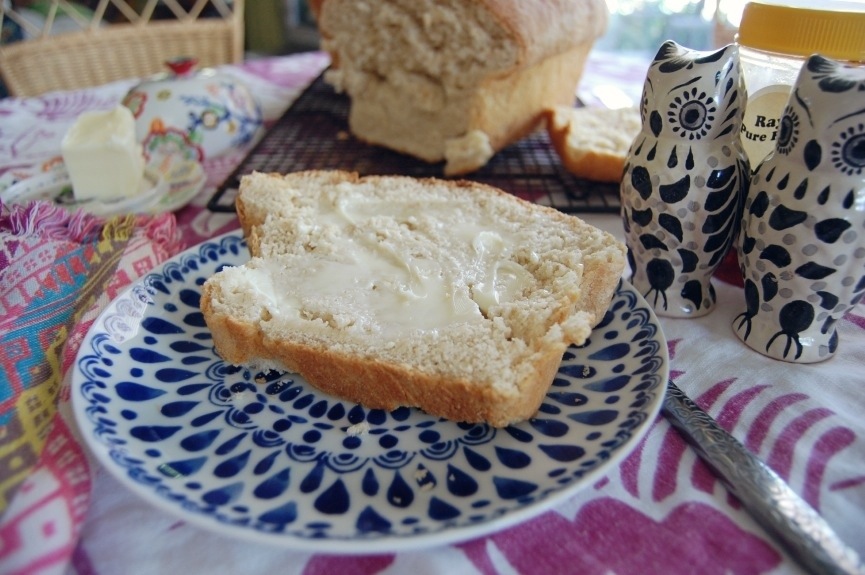
Gosh. I hope I didn’t really break the bread. I hope I just made a nice easy cut. Sawed it back and forth. Then ate it. Is that worse than simply breaking it? I am sure it didn’t feel a thing.
When I am feeling down, nothing makes me feel better than baking or cooking (and no, I do not think you have to be good at one or the either. That makes no sense at all). Just making something. Forming something from simple ingredients into a wondrous treat makes my whole heart heal.
And if nothing else, it gives me calories to burn while I cry. Or laugh. Or both.
And of all of the baked goods, bread absorbs tears the best. At least, that’s what I’ve been told.
My mother-in-law once taught me her secret to perfect bread. And now I’m telling you. And since she is unaware that this little blog exists, you won’t tell her.
See how that works.
Her secret is substituting whatever liquid the bread recipe calls for with apple juice.
Trust me. It is divine.
But with this recipe having honey, I did not want to do all apple juice and make it too sweet, so I simply substituted a cup of apple juice for the original recipe’s full 2 1/2 cups milk. I very slightly adapted this recipe from Taste of Home.
And I loved it.
It wasn’t broken.
The end.
Oh, wait, I still have to teach you how to make it.
Ingredients:
1 1/2 cups milk
2 packets active dry yeast (1/4 oz. ea.)
2 tsp. salt
1/4 cup melted salted butter
1 cup apple juice
7 cups flour + 1/2 cup to spread on counter
1/3 cup honey
Directions:
Pour milk and apple juice in a microwave proof container
Microwave on high one minute. Stir. If the liquid is still not warm to the touch microwave for thirty seconds more (it will depend on the depth of your cup. I just measured milk to 1 1/2 cups and then apple juice to the very top of a two cup measuring cup. You want your liquid warm and not hot. If it is too hot, it will kill your yeast. My mother-in-law uses a thermometer. I use my finger. Again, she’ll neve’ know. But if you like to be precise, the temperature should be 115 degrees Fahrenheit.
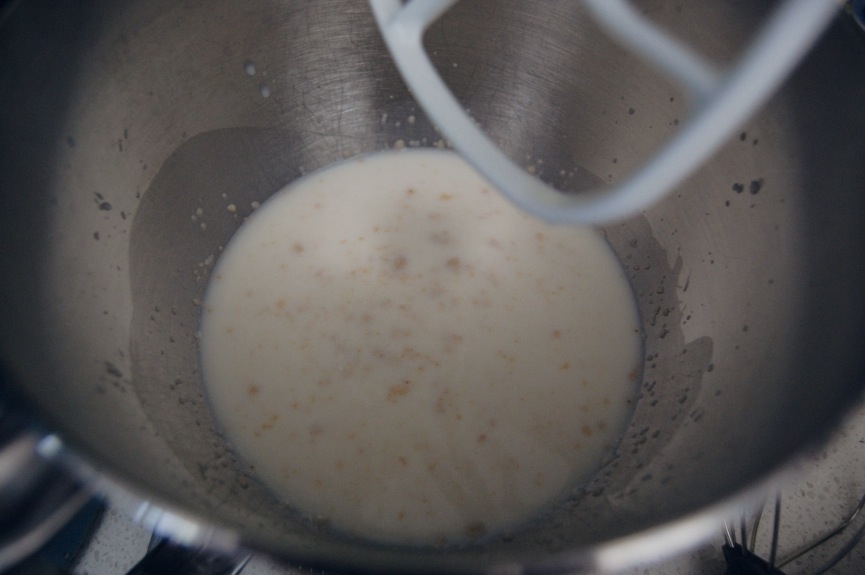
Dump yeast into your mixer. And yes, dump. Not pour. Why? Because “dump” is much more fun to say.
Pour (we can’t get carried away with the other word. It is about to get serious) milk/apple juice mixture in. Stir gently a few times. Let yeast activate for a few minutes (I get impatient. This is usually three minutes for me).
Pour in remaining ingredients. Pour the butter in last because you do not want the hot butter to kill the yeast.

Knead six minutes on your floured surface (or use your dough hook on your stand mixer if you have one. Ditzy me did not realize what that was for until my friend came over and asked me why I just didn’t just use that instead of kneading it by hand. Thankfully my husband did most of the work, because I am a kneady). Form into a large dough ball.
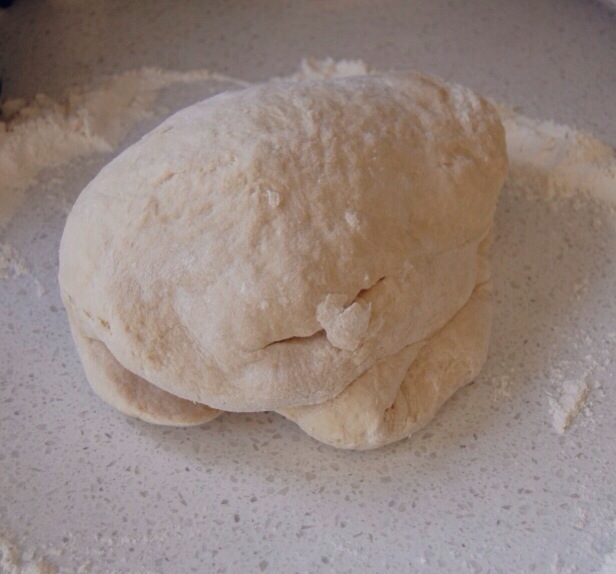
Grease round mixing bowl with butter.
Lay ball of dough in the bowl and then flip the dough once so that all sides of the dough are greased.
Turn oven on to its lowest setting for just two minutes. Do not let it get to a high temperature. Turn oven off. Place a damp dish towel over bowl of dough and place the bowl in the oven for an hour.
Make sure you leave plenty of room above the bowl for the dough to rise in the oven.
Remove bowl from the oven.
Remove the towel.
Punch dough in the middle. (The kids LOVE doing this).
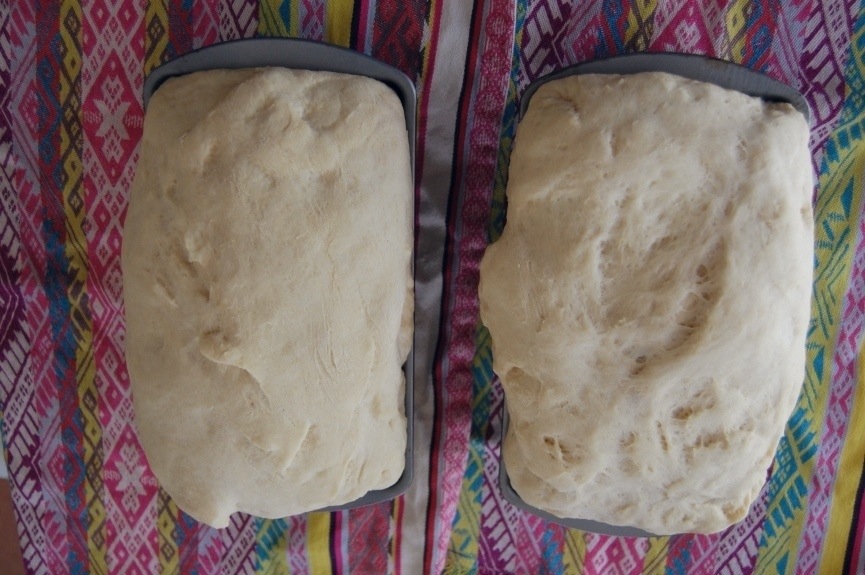
Dough will deflate. Form dough into two loaves (I just rip mine in half, channeling my inner Hulk and just pat that baby into shape) and place into two, greased with butter, 9 X 5 loaf pans.
Place pans in oven to rise for thirty minutes (it will still be warm enough to do this).
Remove pans from oven. Turn oven to 375 degrees. Bake bread for 15 minutes. After fifteen minutes cover the tops of the bread with foil and cook for another eighteen minutes.
Remove loaves from oven. Turn oven off. Remove foil.
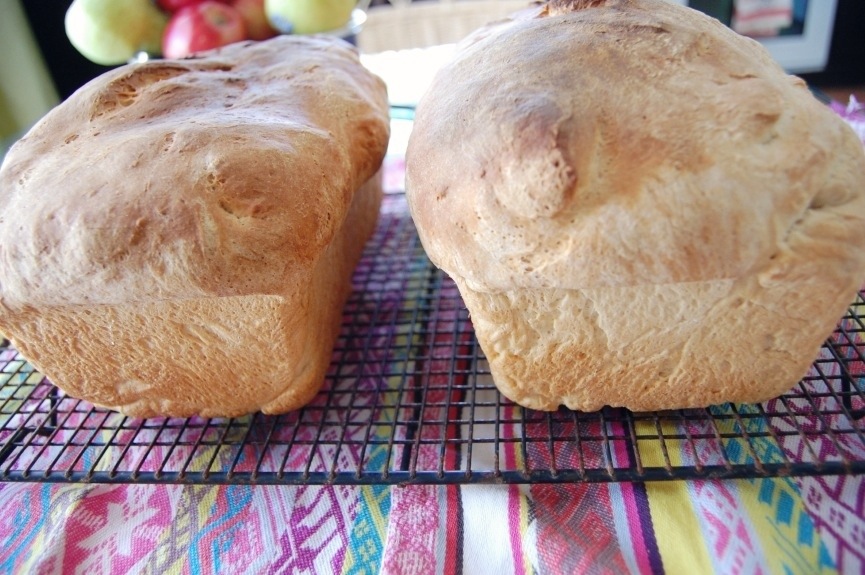
Turn loaves upside down onto a cooling rack one at a time and turn over so they are right side up again.
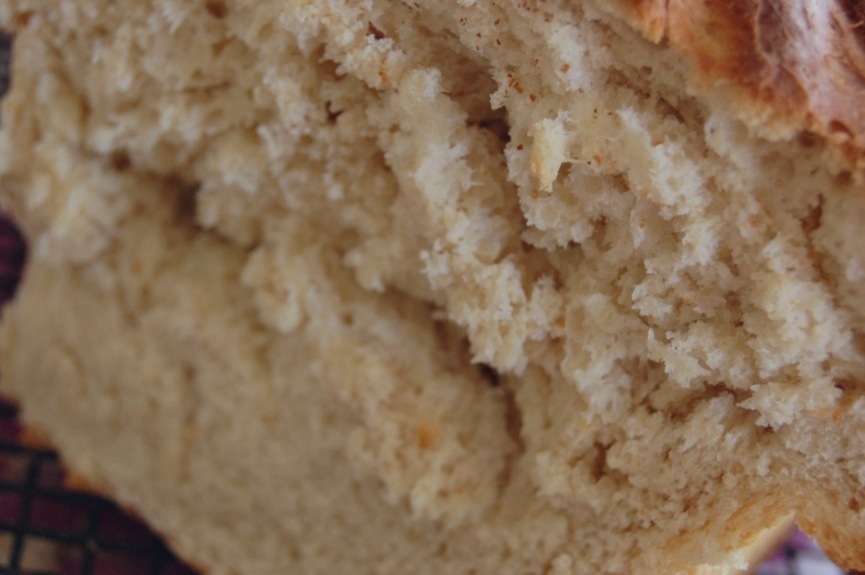
Let cool thirty minutes before eating.
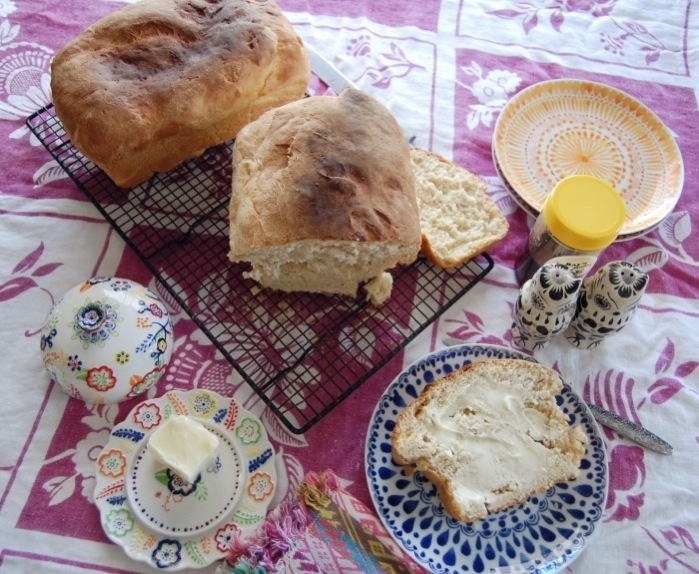
I made the kids and myself a cute little table setting to eat our fresh homemade bread at. We all loved it. It created minimal clean up. And it definitely made the homemade bread feel much more special.

I would say that is not broken at all.