It’s The Little Things: Wave Iron

20140802-155934.jpg

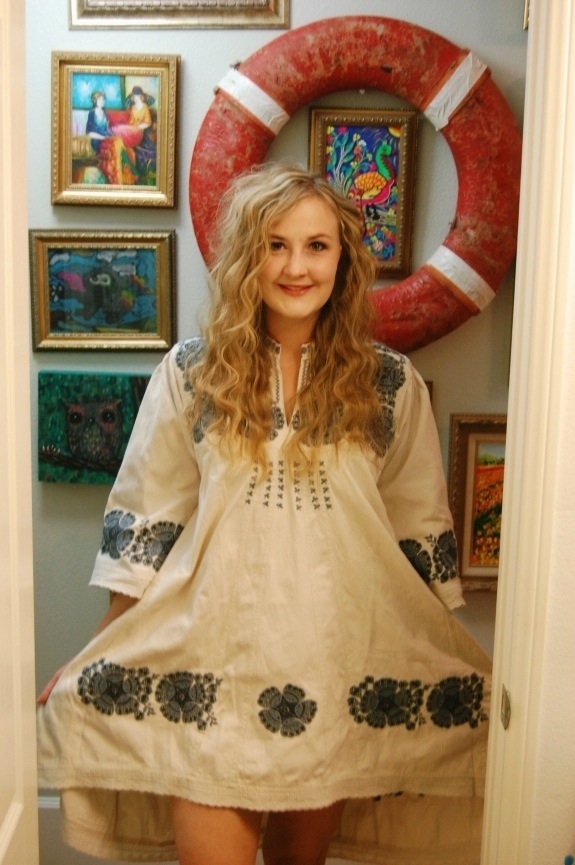
I first learned about the wave iron on a girls’ trip I took to New York City with a bunch of friends four years ago. One of the girls is a genius at doing hair. She did my hair with the wave iron. I was skeptical because I thought it would be like a crimper. But it isn’t. It simply produces soft waves. The waves all of us girls in the eighties wanted. The ones we used to have to get through perms.

I was hooked from the moment she did my hair.

I used to do my hair with the wave iron all of the time, but I lost my wave iron two years ago.

20140802-160442.jpg

I only recently purchased the Pro Beauty Tools Professional Speed Waver from Amazon. It was under $15 so I figured if it did not work, it was not a big deal.

Well, I loved it.

Here is how I use it. Wait! Before I begin, I want it noted that my mirror is not dirty, but rather, when they installed my countertop last year, they reinstalled the mirror with some sort of glue that is now eating through the mirror and causing those marks. I think it looks vintagey, so I do not mind it:

20140802-160543.jpg

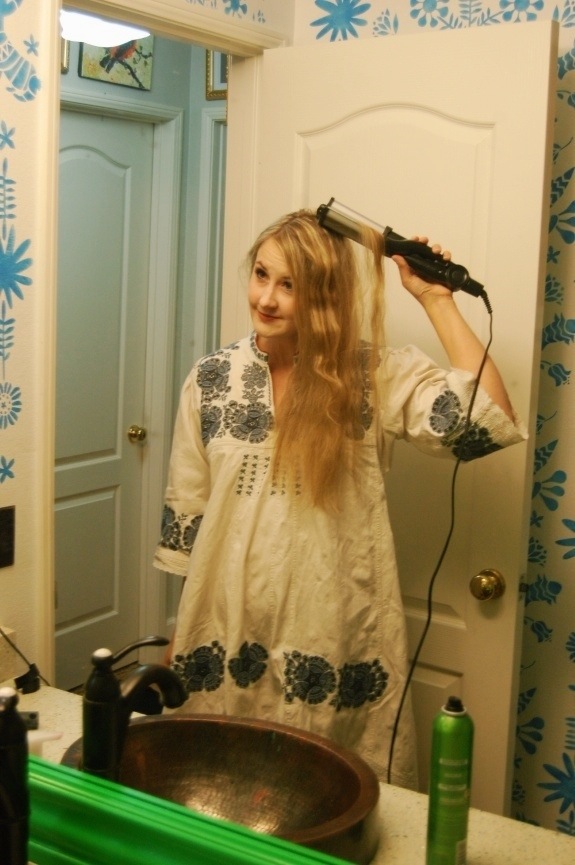
I have very thin hair. It took me nine minutes to wave my entire head. I never use the wave iron with clean hair. The wave is too soft. I like to use it with one day old clean hair. Does that make sense?

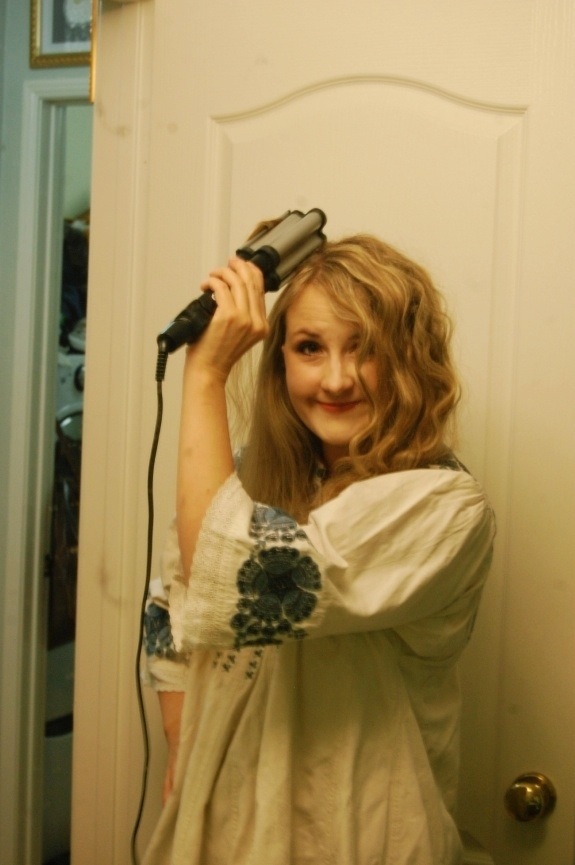
I turn the wave iron onto a setting that is not the lowest but just a little hotter than the lowest setting. You do not want to use the highest setting. This wave iron gets hot and your hair has a greater potential of frying if it is set at that.

20140802-160613.jpg

First I start with a small section of hair and I place the top section of the hair near the root into the wave iron. I count quickly to ten (not in the thousandths, just one, two, three…). When you first try it, count to five to see if it works at a lower number. You do not want to burn your hair!

20140802-162322.jpg

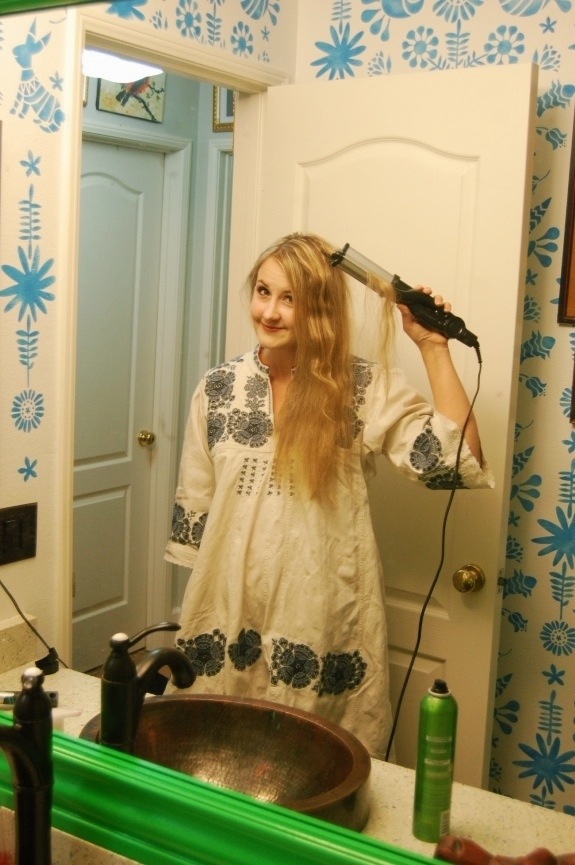
Then move the wave iron down to an unwaved section and count again. Do this until you reach the end of that section of hair. Because ends of hair are usually the driest, I only count to five at the ends. They have a greater potential to burn off with heat so I do not want to chance it. Plus it looks more beachy with the ends slightly not as wavy as the rest of the hair. I always do one half of my head before I do the other half.

20140802-160655.jpg

20140802-160738.jpg

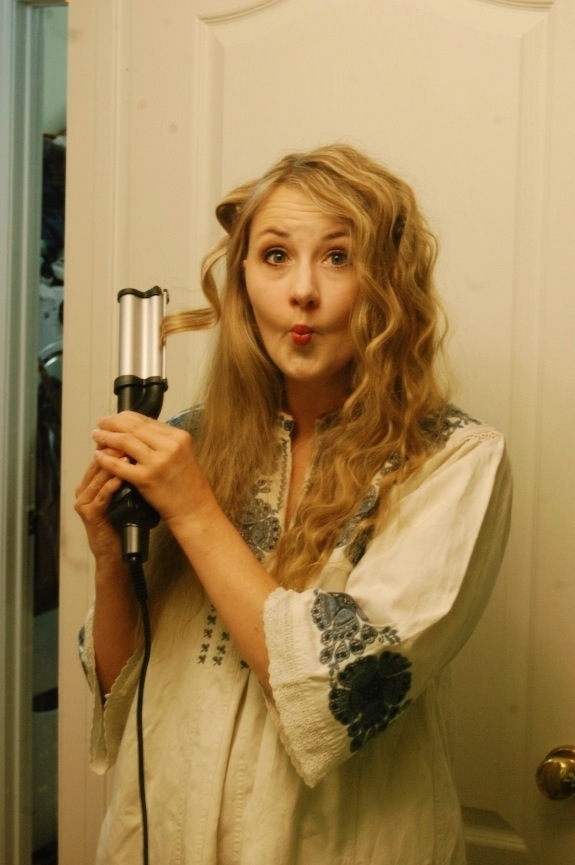
Pretend you’re a mermaid and make a fish face. Yes, this part is necessary. Trust me. Your hair will not turn out if you do not do this.

20140802-160817.jpg

Repeat all over head. Then do not forget to unplug your wave iron (this message is to myself because inevitably five minutes after we have left the house, we have to turn around to check to make sure I have unplugged my devices. Be better than me!).

20140802-160850.jpg

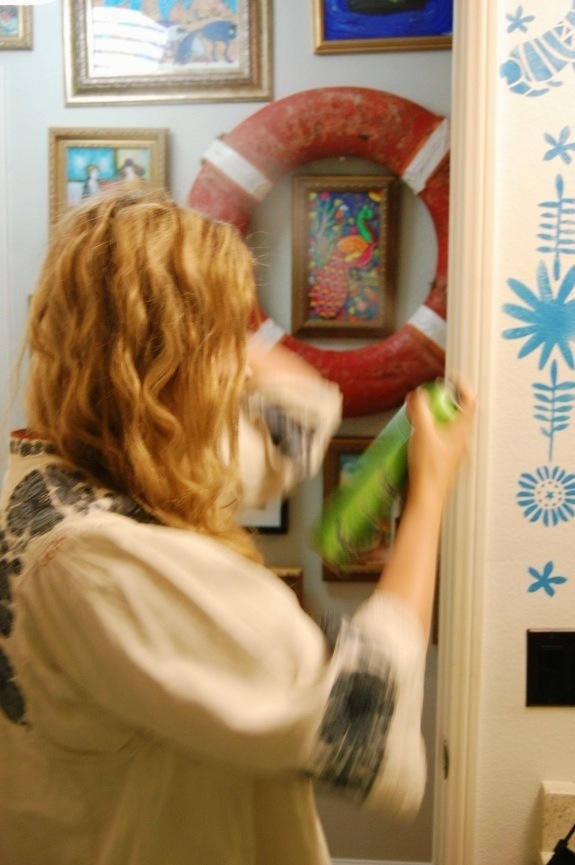
Spray with hairspray.

20140802-160918.jpg

Make a funny face.

20140802-161125.jpg

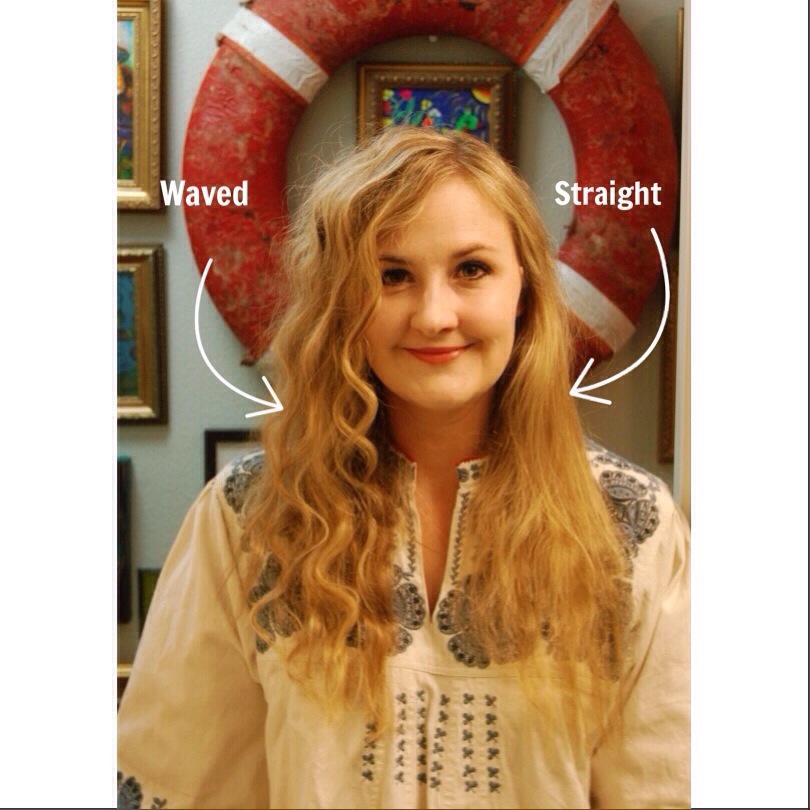
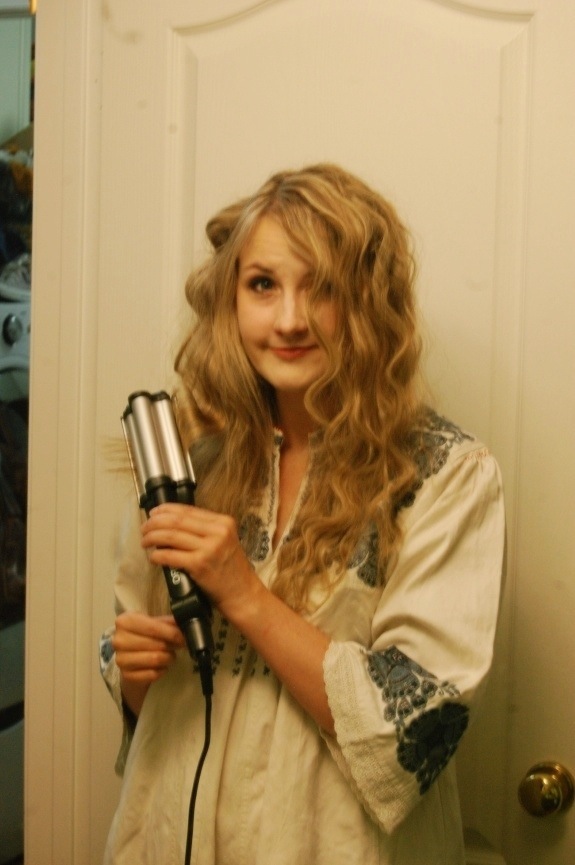
Enjoy your waves! These are nice the next day, too. The wave is softer and more beachy then. Plus the wave hides dirty hair pretty well. I touch up a section if it needs it.

I do not use this all of the time. Any kind of heat is not good for your hair. So, use sparingly. I used mine five times before I reviewed it here because I wanted to make sure I would recommend it.

I do. With that said, as with any product your experience may vary. And as with any beauty tool, please use with caution and at your own risk.

I purchased this wave iron with my own money. I was not compensated for writing this post. However, the link above is an affiliate link. Purchasing the wave iron from the link will provide a small commission for this blog.

Do you have a wave iron? How often do you use it? I use mine about once a week, but I can usually get two to three days of wave from that one day.

It’s The Little Things: Changing Your Hair In A Fun Impermanent Way.

*The dress in the photos was styled and ironed previously in this post here.

It’s The Little Things: Wondra

20140312-135025.jpg

I am about to share somethin’ kind of embarrassing.

I know.

Shocking.

And the thing I am going to say won’t be very shocking either.

I hoard food.

And when I find something new I like, well, I buy as much as I can of the stuff.

Just in case,

You never know.

They could stop making it.

Or, um, there could be a zombie apocalypse.

Just so you know, each of those sentences caused a tightness in my chest.

I first bought some Wondra to add to my Momma’s Goin’ Out Crockpot Chicken that I make for my family. Wondra is a special type of flour that does not clump when added to a recipe. It is very fine. This makes it perfect for gravies.

I had never heard of it before last year. And I really cannot remember how I first heard of it. But if I were to guess, I would guess my best friend t.v.

I found it, of all places, on Walmart.com. And I assumed since I had never heard of it, well, they must not carry it at any of my local grocery stores. Of course, I did not check. Because when you are online shopping, everything is justifiable.

Everything.

So, I bought five containers of it.

As one does.

When they are a hoarder.

Or watch too much “Walking Dead.” Because if there was a zombie apocalypse, the first thing one would seek out would be non-clumping flour.

I wanted free shipping with that order, so I added some snack items to the mix to make my food order come to $50.

And I waited.

And Walmart shipped my small food order in four different huge boxes.

And my husband thought I was crazy.

More than usual.

As my food. From. Walmart. Arrived. In several boxes at the door.

I do have a point, I swear.

20140312-135255.jpg

Anyhoo, the other day I was making chocolate chip cookies from this recipe. And I ran out of regular flour. I guess my hoarder side did not recognize that this was a possibility. The shame. I ran out of flour right as I needed it to add to my cookie recipe.

20140312-135333.jpg

So, I checked my pantry. And I saw my Wondra.

I added 1 1/3 cup of Wondra and 1 cup of regular flour (all that remained of my stash).

And I baked my cookies.

The cookies were good. I could not tell the difference.

Until…

The next day, when I pulled a cookie from the cookie platter I usually keep them in. And the cookie… It was still soft! My dears, this never happens! My cookies always get hard overnight.

The next day… Still soft!

I made the cookies again. And it was the same occurrence. By substituting a little over half of the real flour with Wondra, my cookies kept their original fresh-out-of-the-oven texture!

It is a miracle.

I had to share.

It’s The Little Things: Soft Cookies!

Have you heard of Wondra? Have you tried it? In cookies? Who knew?

My cookie recipe available in the link above uses 2 1/3 cups of flour. I tried the Wondra trick a few days later substituting 1 cup of Wondra and using 1 1/3 cup real flour. The cookies were still softer than usual, but you definitely need the first ratio of 1 1/3 cup Wondra and 1 cup regular flour. Although, if you like your cookies really flat, than the one cup of Wondra was a perfect amount. They just were not as soft the next day.

The cookies made using the Wondra flour also seem to take less time to bake. So make sure you watch them so they do not burn.

And just so you know, the other day my husband and I were shopping together at the grocery store. He nudged me and said, “Hey! Isn’t that Wondra? The Wondra that you said was only available online? And now we have a whole shelf filled with it?”

I ignored the question. I ignored the little blue containers staring accusingly at me from the shelf. I ignored the other accusing stare as well.

But…

Yea. You can probably find this in your grocery store. And you probably don’t need to hoard it.

Probably.

20140312-135508.jpg

* this post is not affiliated with or sponsored by Wondra. I just like to write about products that I enjoy using. As with any product I review, your experience with it might vary. : )