Goldfish/Cheez-It Chicken Strips

20140204-211923.jpg

My daughter likes Goldfish Crackers.

My son likes Cheez-It Crackers.

And never the two shall meet, well, except:

20140204-211517.jpg

“Mom! He/She’s eating my crackers!” This is a common exclamation screeched throughout my house.

And then the tiresome response, “They’re not your crackers. They’re my crackers!”

How annoying.

Well, actually. That last response is mine.

‘Cause it’s true. I did buy them.

I decided to use up some of these snack bags of crackers. I would like to say it is because I wanted to show the kids that the crackers could work in perfect harmony. Much like themselves.

But, really, I just had a lot of chicken.

And too many crackers.

I remembered making a similar recipe with my daughter with Cheez-It Crackers when she was two. And not liking it.

However, if there is a will. There is a way.

And my soul was drowning in the cheese cracker meltdowns going on in my house.

Here is how we all lived in harmony, with the crackers… For one night:

Ingredients:

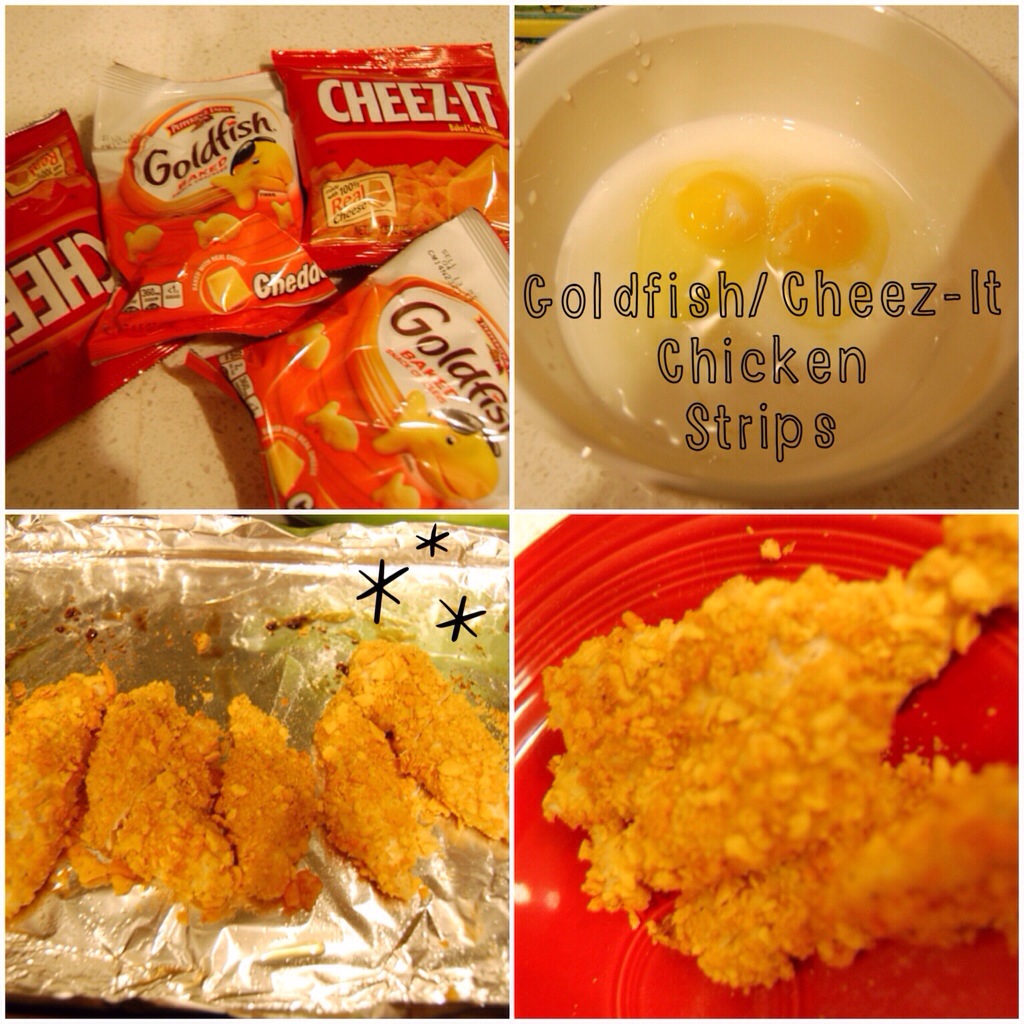
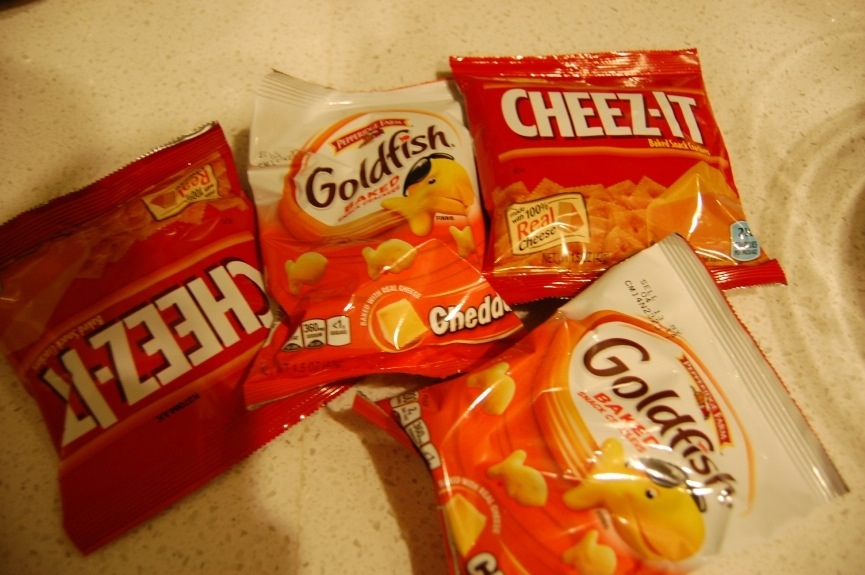
1 cup of Cheez-It Crackers (I used 2 snack bags)
1 cup of Goldfish Crackers (I used 2 snack bags)
2 pounds chicken tenders
2 eggs
2 tbsp. Milk
2 Tbsp. Water
1/8 tsp. ground cayenne pepper
1/8 tsp. ground black pepper
1/2 tsp. salt
1 Tbsp. Garlic powder
1/4 tsp. paprika
Extra salt to taste at end

Let’s get cracking!

Preheat your oven to 350 degrees.

In a big bag, crush your crackers. I use the smooth part of the mallot. And when I say, I, I mean my kids. Because kids like crushing crackers even more than they like fighting over them.

They actually made all of the chicken strips themselves.

Line two baking sheets with foil sprayed with nonstick cooking spray.

20140204-212109.jpg

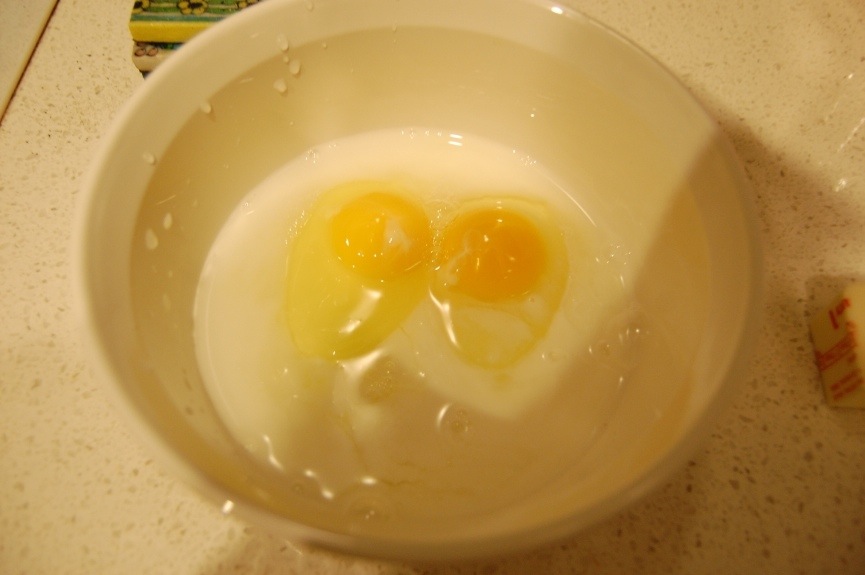
In a small bowl, beat the two eggs with a fork. Add milk and water, and whisk together.

In a separate bowl, pour the cracker crumbs. Add cayenne pepper, pepper, salt, garlic powder and paprika. Stir together.

20140204-212135.jpg

Take a chicken tender and drench it in the egg mixture. Then dunk the wet chicken tender in the cracker mixture. The kids actually did all of this themselves. Do you know what a kid likes better than fighting over crackers? Or crushing crackers? That’s right, coating chicken with crackers.

20140204-212327.jpg

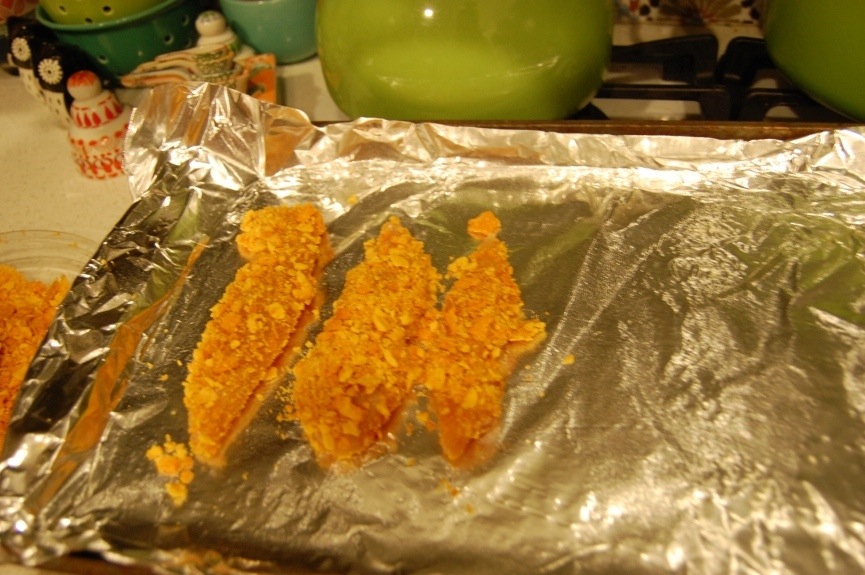
Place the chicken tenders on the baking sheets after the above steps have been completed.

20140204-212358.jpg

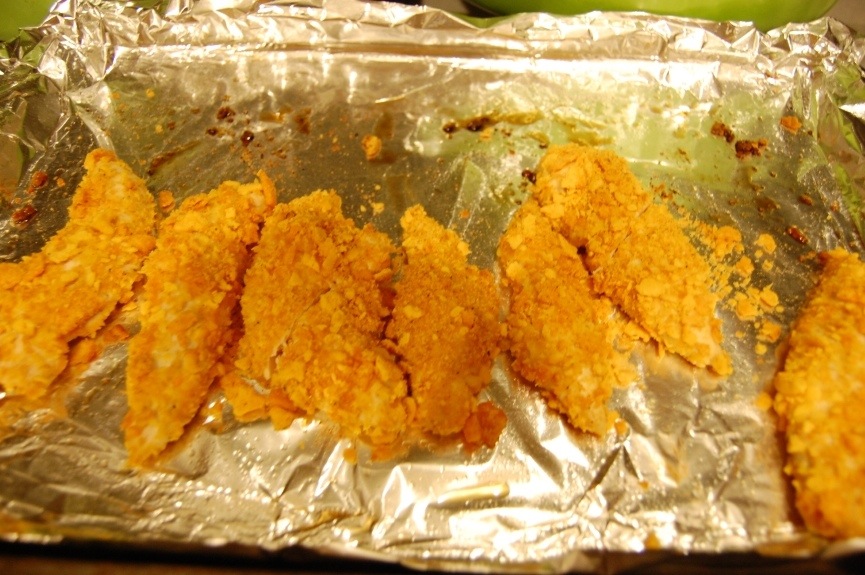
Bake the chicken tenders for 20-22 minutes until they are no longer pink on the inside (mine took 22 minutes).

Carefully remove the pans from the oven. Sprinkle chicken strips with salt.

20140204-212249.jpg

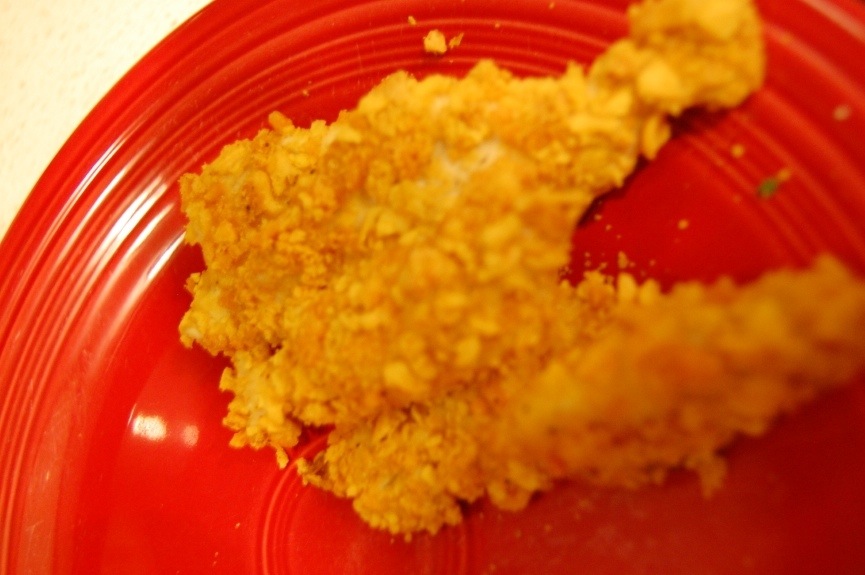
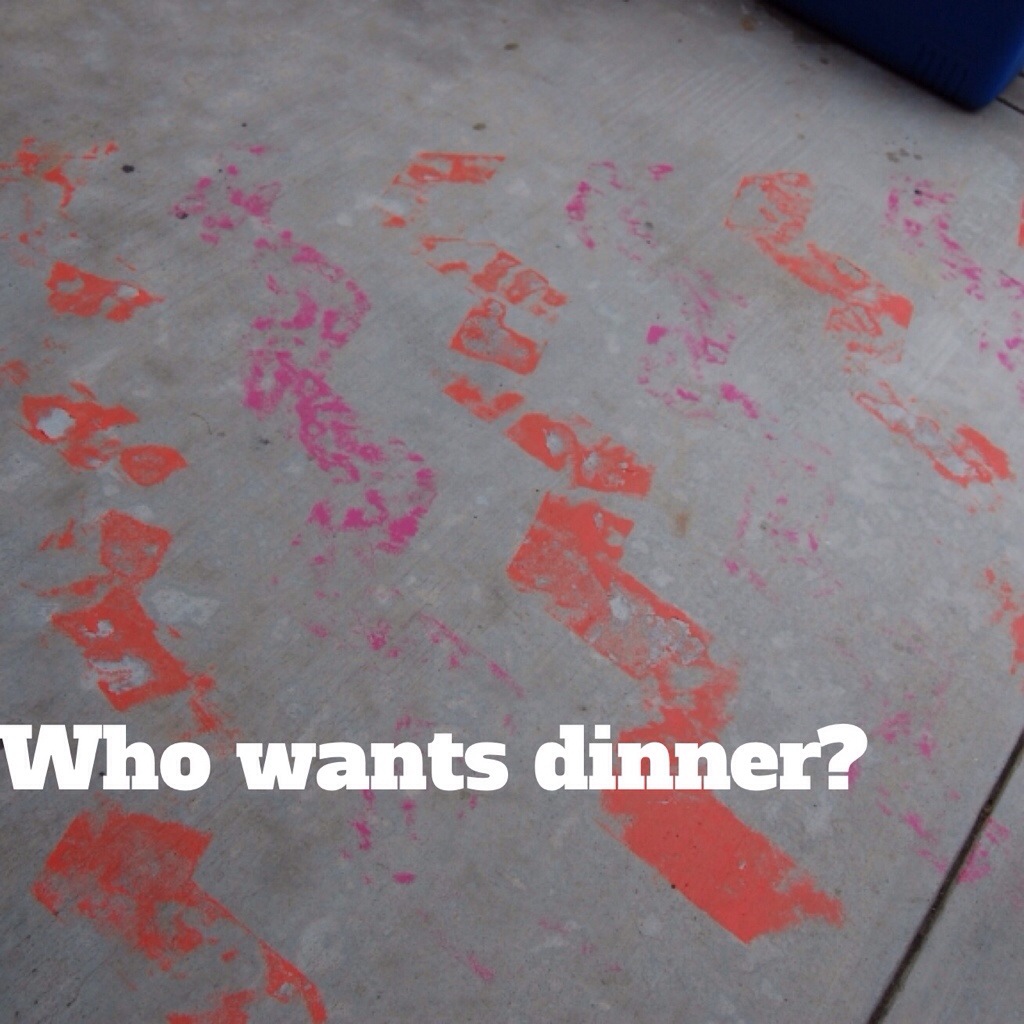
Serve up the chicken strips (all I have is this sad little picture. Because kids making chicken takes a bit of time. And I was starved. I will update as soon as the next cracker debate occurs. I can imagine this will be soon).

These were so incredibly yummy. I might need to keep all of my crackers.

20140204-212039.jpg

I did not take a good picture of the finished chicken product. But I did snap a picture of the biscuits I made while the kids made the chicken strips.

I love when things come together! Enjoy!

And revel in your peace making.

At least for the time being.

Easy Christmas DIY Ideas

These Christmas projects I have completed around my house are so incredibly simple anyone can do them.

I see you are still skeptical.

Well, let me introduce myself.

“Hello. I’m Anyone.”

And if I can do these crafts, you can, too. I use the word “craft” very loosely here.

20131222-004816.jpg

20131222-004847.jpg

First up, instead of spending money on flowers during the holidays, I load my vases with giant paper pom pom flowers. This is a fun project to do with tissue paper. I purchased mine from a seller on Etsy. However, I have also made my own by cutting tissue paper. Martha Stewart also sells a fun and easy kit.

I usually use red and pink during Christmastime. But this year I needed something more peaceful. I chose the taupe and white. I have reused all of my paper pom poms for years. I had these leftover from my sister’s baby shower. No, I never throw anything away. Yes, it’s a problem. Just don’t tell Anyone.

20131222-004745.jpg

20131222-004708.jpg

I saw this project in a woman’s home many years ago in Country Living Magazine. It is just a cheap felted red tree skirt you can purchase anywhere. I believe I bought mine during an after Christmas sale for $2. Just take a black sharpie and trace your kid’s handprints on it every year. The first year will look pretty sad. But each year the skirt gets better and better. I have done this for four years and it is so much fun to see how they have grown. Make sure you put the name and age of the child under the handprints.

This could also be a fun couple’s project. Just trace your husband’s and your own handprints each year with the date.

When the children are grown and out of the house, I plan to embroider around each handprint. I’ll have more time then, right?

20131222-005027.jpg

20131222-005100.jpg

I like twine. A lot. I kind of want to use it on everything. I see my kids running now.

Any time I see a set of ornaments all the same, I think garland. The owl and little bird garlands both started out as cheap ornament packages. I just cut the strings on the ornaments and tied them onto the twine. Then I made a loop at each end. Hang these wherever you desire. And done! This is such an inexpensive project.

20131222-004957.jpg

I have even made a mushroom garland for my little tree.

What are your fun and easy projects you have done during the holiday season? I would love to get some new ideas. I still have to make two gingerbread houses with the kids tomorrow. I hope your week is as peaceful as it can be.

And if you feel you are overwhelmed, well, you are not alone:

“Time stays long enough for Anyone who will use it.” (Leonardo da Vinci)

I hope that is true.

I could really use a visit from the temperamental fellow.

P.S. I shared this on My Romantic Home.

I’m Crafty Crazy

20131125-105843.jpg

I am not crafty. Oh, how I long to be.

But I’m not.

Please remind me of this the next time I decide to do a project. Because I always do. And I always end up reenacting Amelia Bedilia. And crying. Then laughing like a maniac. Then crying. I think I confuse “crafty” with “crazy.”

I saw this Chevron tablecloth on Anthropologie’s Website and I loved it! But at $228, I knew that even if it went on sale, it would be too expensive for me. I thought, how hard could it be to make one myself?

You probably all ready know the answer to that.

Well, first I purchased a tablecloth in a neutral linen from Target’s website. Then it came and I promptly set it on my husband’s desk for three weeks and ignored it. Until finally, I begged my husband to help me make this tablecloth. And because my husband is the closest thing to committing me to a perfect human being that I know, he agreed.

He cut me a templet from Elinee Studio. And we watched the video Her video is for a rug, but I figured it would be similar enough to my project to work. This was incredibly helpful. Honestly, if we had not watched the video or used her template, we would have had a tear-splattered fiasco at the end of this project.

I took the tablecloth out of the package. And I stared at it. It was itty bitty. My husband looked at it.

“What size did you get?” He asked.

“Um. I don’t know. Whatever size it came in.”

“You mean you didn’t look at what size the Anthropologie tablecloth was and buy the same one?”

“I didn’t even think of doing that,” I said, as air whistled through my ears.

“Well, what are you going to do?”

“I don’t know! Maybe I’ll just use it on our breakfast table.”

“Is it square?” Says my my husband, who is the owner of a square breakfast table…as am I.

“Uhhhhh. No. But I could just let the sides dangle.”

Silence.

Then the sound of me tapping on the computer and ordering the correct size off of the Target website. Thankfully they had it, and because I used my Target Debit Card I got free shipping.

But now I had to wait for the correct size to come…

20131125-105116.jpg class=

It came rather quickly and we set to work.

20131125-105008.jpg

20131125-110625.jpg

20131125-104919.jpg

20131125-105045.jpg

It took the two of us approximately three hours to tape the tablecloth.

20131125-105157.jpg

The next day, we decided to paint it. We mixed up our two bottles of orange fabric paint and quickly realized that it would probably not be enough.

20131125-105331.jpg

We added some yellow and red that I had on hand and made this color. It still did not look to be enough. I suggested that we paint every other row just in case. Thank goodness we did, because we ran out. As you do…when you suck at DIYing.

20131125-105545.jpg

Now, we had a soggy half painted tablecloth outside.

20131125-105455.jpg

I decided to sacrifice my pink paint I had on hand to fill in the other rows. I just wanted to finish it. So, that is how our tablecloth ended up looking like this. A mished mashed version of the original. I am not sure how I feel about it. I would have preferred all orange, but we worked with what we had.

While we were painting, my husband burst out laughing. I smiled and asked him what was so funny. He said he was imagining what I was going to write about this tablecloth in my blog post.

I said, “Don’t laugh. We’re creating a family heirloom.”

He responded, “This will be the first thing our son’s wife will throw away.”

We both laughed. But now that kind of breaks my heart.

We continued to paint. And I asked my husband, “So, what do you think this is going to look like?”

The eternal optimist responded as if there was no other option, “I think it’s going to look great!”

I laughed and said, “Honey, when have we ever painted a straight line? Even with painter’s tape?”

He laughed.

I think you can guess the answer to those questions, too.

20131125-110302.jpg

20131125-105641.jpg

This was our finished project. It ended up costing much, much more than I thought it would. My husband is in love with it. Which is cute. I think it is okay. We will definitely use it. And I have happy memories of us making it together. You know, we should make another one! I cannot believe it actually turned out with no major mishaps.

20131125-110203.jpg

On second thought, maybe waiting for sale isn’t such a bad idea after all.

Look at what us DIYers did to our concrete. Yup! We are super smart professionals. Obviously, if you attempt this, and why wouldn’t you after seeing all of the fun we had, place a tarp underneath your project.

Or maybe you want a permanent reminder of the day you painted a tablecloth?

Because, obviously, we did, too. Forget the tablecloth! Let’s just make a random half painted tablecloth design on our concrete. This is genius if you ever have company you don’t like over. Just start laying dishes on the pattern on the ground. Then sit cross legged around it like you would at a table. How fun would that be?

Thankfully it came off, but I should add paint stripper to the final total. And maybe a therapy bill. Because why do we keep doing this?

Project Costs: $61.76

After tax and my discounts (ebates, using Target Debit Card) Tablecloth = $16.78
Fabric paint (7 4 oz. bottles after tax and discount) = $29.48
Paint pan, 2 rollers, 2 sizes of painter’s tape approximately $15.50 (I lost the receipt. Surprise! But I remember it being $15 something).

Have you DIYed anything lately? Are you crazy crafty? Or are you like us and just think you are sometimes?

Oh, and if you are wondering what became of the “too small” tablecloth, well, I have just the project for it… ; )

* I am playing catchup from being sick. Sorry I am behind on emails and posts. I hope to accomplish everything by Wednesday. A new post will run on Tuesday night. I will also post Wednesday. And I am doing a “live” Thanksgiving post on Thursday, updating throughout the day with things I am grateful for. After that, my regular daily schedule will commence. Thanks for bearing with me! I hope your week is great!”